Monitor your Websites and Apps using Uptime Kuma
Introduction
Uptime Kuma is a self-hosted monitoring service that you can use to keep track of the heath of your applications, websites, and APIs. You can configure it to watch services with different types of health checks and set up email notifications for when there are problems. Uptime Kuma also lets you design custom status pages that you can use to share public information about your service health statuses and to manage incidents.
This guide will describe how to set up Uptime Kuma on Koyeb to monitor your services and send notifications. Uptime Kuma uses a local SQLite database to store user data, configuration for services, and more. We will deploy it alongside Litestream to automatically replicate the data to an S3-compatible bucket hosted on Backblaze's B2 service. We'll use a Mailgun account to set up SMTP details for notifications.
You can deploy and configure Uptime Kuma as configured in this guide using the Deploy to Koyeb button below:
Note: Remember to edit the environment variables to match your own information. You can find out more about this requirement in the deployment section.
Requirements
To follow along with this guide, you will need to create accounts with the following services. Each of these services offers a free tier that you can use to get started:
- Koyeb: We will use Koyeb to deploy, run, and scale the Uptime Kuma instance.
- Backblaze B2: We will use Backblaze's B2 object storage service to store the SQLite database that we replicate using Litestream.
- Mailgun: We will use Mailgun to send notification emails when any of our monitors need to report problems.
- GitHub: We will create a custom Dockerfile so that we can deploy Uptime Kuma with Litestream. We will store this and the associated files in a repository on GitHub so that we can build and deploy easily with Koyeb.
Steps
This guide will cover how to deploy Uptime Kuma to Koyeb with the following steps:
- Create an object storage bucket with Backblaze B2
- Set up the Mailgun SMTP service
- Create a Litestream configuration and starting script
- Create a Dockerfile for Uptime Kuma and Litestream
- Push project files to GitHub
- Deploy Uptime Kuma to Koyeb
- Configure Uptime Kuma
Create an object storage bucket with Backblaze B2
Upstream Kuma uses a local SQLite database to store account data, configuration for services to monitor, notification settings, and more. To make sure that our data is available across redeploys, we will bundle Uptime Kuma with Litestream, a project that implements streaming replication for SQLite databases to a remote object storage provider. Effectively, this allows us to treat the local SQLite database as if it were securely stored in a remote database.
To create an object storage bucket for the Uptime Kuma SQLite database, log into your Backblaze account and follow these steps:
- In the B2 Cloud Storage section on the left side of the dashboard, click Buckets.
- Click Create a Bucket to begin configuring a new bucket.
- Choose a name for the bucket. This must be globally unique, so choose a name not likely to be used by another user.
- Set the bucket privacy to Private.
- Enable the default encryption. This will help protect sensitive files in storage.
- Choose to Disable the object lock. We want the Litestream process to be able to manage the SQLite object's life cycle without restrictions.
- Click Create a Bucket to create the new bucket.
Copy and save the following information about your new bucket. You'll need it later to configure Litestream:
| Backblaze B2 item | Litestream environment variable | Example value |
|---|---|---|
| Bucket name | LITESTREAM_BUCKET | some-bucket-name |
| Endpoint | LITESTREAM_URL | s3.eu-central-003.backblazeb2.com |
| Region | LITESTREAM_REGION | eu-central-003 |
Note: The region above is taken from the second component in the endpoint URL. It is not presented as a separate item within Backblaze's interface, but is necessary to correctly configure Litestream.
Now that you have a bucket, you need to create API credentials so that Litestream can authenticate to Backblaze as well as upload and manage Uptime Kuma's SQLite database files:
- In the Account section on the left side of the dashboard, click Application Keys.
- Under Your Application Keys, click Add a New Application Key to begin configuring a new key.
- Select a name for your key to help you identify it more easily.
- Select the bucket you just created in the Allow access to Bucket(s) drop-down menu.
- Select Read and Write as the access type.
- Leave the remaining fields blank to accept the default policies.
- Click Create New Key to generate the new key to manage your bucket.
Copy and save the following information related to your new API key. You'll need it to properly authenticate to your Backblaze account and perform object operations:
| Backblaze B2 item | Litestream environment variable | Example value |
|---|---|---|
keyID | LITESTREAM_ACCESS_KEY_ID | 008c587cb98cb3d0000000003 |
applicationKey | LITESTREAM_SECRET_ACCESS_KEY | K002cbYLV/CkW/x+28zsqmpbIAtdzMM |
Set up the Mailgun SMTP service
Next, you need to copy the SMTP information for your Mailgun account. We will configure Uptime Kuma to send notifications by email when outages occur on the services we monitor.
To begin, log into your Mailgun account. In the side navigation pane, open the Sending menu. Next, click the Overview sub-menu item.
Mailgun offers sandbox domains to test its functionality. These are useful, but restricted to sending emails only to previously authorized email addresses. We can use this to test the mail delivery with Uptime Kuma for free. On the right sidebar of the Overview page, enter the email address you want to send test emails to in email address input field of the Authorized Recipients section and click the Save Recipient button.
Mailgun will send a verification email to the provided address. In the verification email, click the I Agree button to complete the authorization process. If you refresh the page in Mailgun, you see that the target email address is now marked as verified.
From this same page, click the Select box associated with "SMTP" to see the information you need to send email using your Mailgun account. The information related to using SMTP with your Mailgun account will be displayed. Copy and save the following information:
| Mailgun SMTP info | Uptime Kuma Email field | Example |
|---|---|---|
| SMTP hostname | Hostname | smtp.mailgun.org |
| Port | Port | 587 |
| Username | Username | postmaster@sandboxbac59f0e6dac45cdab38e53aee4e1363.mailgun.org |
| Password | Password | e627704d99111f00c7aedf3805961383-262b123e-66b6979f |
Create a Litestream configuration and starting script
To ship Uptime Kuma and Litestream together, we need to create a Docker image that installs and configures both components. We'll start by creating the supporting files that the Dockerfile will copy over to the image. This includes a Litestream configuration file and a startup script to tell the image how to execute.
To get started, create and move into a new project directory on your local computer for the Uptime Kuma container image assets:
mkdir uptime-kuma-litestream
cd uptime-kuma-litestream
Next, create a Litestream configuration file called litestream.yml. Paste the following contents within:
# Automatically start Uptime Kuma when Litestream begins replicating
exec: node /app/server/server.js
dbs:
  - path: /app/data/kuma.db
    replicas:
      - type: s3
        access-key-id: '${LITESTREAM_ACCESS_KEY_ID}'
        secret-access-key: '${LITESTREAM_SECRET_ACCESS_KEY}'
        bucket: '${LITESTREAM_BUCKET}'
        path: '${LITESTREAM_PATH}'
        endpoint: '${LITESTREAM_URL}'
        region: '${LITESTREAM_REGION}'
        retention: 72h
        snapshot-interval: 12h
As you may have noticed, most of the deployment-specific information in the configuration is actually just referencing environment variables. Litestream will automatically interpolate environment variables in its configuration, which means that we don't need to provide details now; we can set them at runtime instead.
Let's go over what, in general, the configuration is defining.
First, the exec line configures Litestream to start up and monitor a specific process. In this case, the /app/server/server.js will be the main Uptime Kuma process in the Dockerfile. When using litestream replicate, the command that streams SQLite logs to an object storage bucket, it will automatically start the process listed here and ensure that the final SQLite changes are uploaded when the process ends.
The dbs key outlines the configuration for the actual SQLite database. We set the path to Uptime Kuma's database in the container filesystem with the path key. We then define the replicas that it should upload to. In our case, we define an S3-compatible object storage location. As mentioned earlier, most of the specifics of the configuration are to be set at runtime through environment variables.
Two settings we do configure explicitly are retention and snapshot-interval. The retention setting defines how long snapshots and WAL (write ahead logging) files are kept. After the retention period has elapsed, a new snapshot will be created and the older one will be removed. The snapshot-interval specifies how frequently snapshots are taken to reduce the time to restore the database. With our configuration, snapshots will be taken every 12 hours and any snapshots and WAL files older than 72 hours will be automatically deleted.
Next, create a new file called run.sh. Put the following contents within:
#!/bin/sh

echo "trying to restore the database (if it exists)..."
litestream restore -v -if-replica-exists /app/data/kuma.db

echo "starting replication and the application..."
litestream replicate
This is the script that we will execute whenever a container based on our Dockerfile is started. It executes two main commands in sequence. First, it uses the litestream restore command to restore the database from object storage when present. It gets all of the information it needs about the object storage from the configuration file we created earlier. This command allows us to deal with the ambiguity of not necessarily having the SQLite database on the local filesystem when the container starts and not having the database in object storage on the initial run.
After restoring the database to the local filesystem, we then call litestream replicate. In spite of looking simple, this command does a lot. It starts the process listed in the exec key in the lightstream.yml file and then begins to replicate any changes to the associated database to the remote object storage bucket. It will continually stream changes to the bucket until the process stops, at which time it will upload the final changes and exit.
Before continuing, make the script executable so that the file has the appropriate permissions when copied to the Dockerfile:
chmod +x run.sh
Create a Dockerfile for Uptime Kuma and Litestream
Now that we have the supporting files that Litestream and Uptime Kuma need, we can create a Dockerfile with the necessary software.
Create a new file called Dockerfile with the following contents:
# Builder image
FROM docker.io/alpine as BUILDER

RUN apk add --no-cache curl jq tar

RUN export LITESTREAM_VERSION=$(curl --silent https://api.github.com/repos/benbjohnson/litestream/releases/latest | jq -r .tag_name) && curl -L https://github.com/benbjohnson/litestream/releases/download/${LITESTREAM_VERSION}/litestream-${LITESTREAM_VERSION}-linux-amd64.tar.gz -o litestream.tar.gz && tar xzvf litestream.tar.gz

# Main image
FROM docker.io/louislam/uptime-kuma as KUMA

ARG UPTIME_KUMA_PORT=3001
WORKDIR /app
RUN mkdir -p /app/data

COPY --from=BUILDER /litestream /usr/local/bin/litestream
COPY litestream.yml /etc/litestream.yml
COPY run.sh /usr/local/bin/run.sh

EXPOSE ${UPTIME_KUMA_PORT}

CMD [ "/usr/local/bin/run.sh" ]
This is a multi-stage Dockerfile that builds on the official Uptime Kuma Docker image to bundle Litestream with it.
The first stage uses the alpine base image and acts as a builder to download and extract the Litestream binary. First, it installs curl, tar, and jq using the package manager. It then uses curl and jq to find the version number for the latest Litestream release on GitHub. It downloads the appropriate archive file using the parsed version and extracts the binary to the local filesystem.
The second stage is based on the main Uptime Kuma Docker image. We create the /app/data directory expected by the Uptime Kuma process and begin copying files. We copy the Litestream binary from the previous stage and copy over the two files we created in the previous section. Finally, we expose the port and set the CMD to run our run.sh script when the container starts.
Push project files to GitHub
We now have all of the files required to successfully deploy Uptime Kuma. The next step is to make them accessible by uploading them to a GitHub repository.
In the project's root directory, initialize a new git repository by typing:
git init
We will use this repository to version the container image files and push the changes to a GitHub repository. If you do not already have a GitHub repository for the project, create a new repository now.
Afterwards, add and commit the files to the repository and upload them to GitHub with the following commands:
git add litestream.yml run.sh Dockerfile
git commit -m "Initial commit"
git remote add origin git@github.com:<YOUR_GITHUB_USERNAME>/<YOUR_REPOSITORY_NAME>.git
git push -u origin main
Note: Make sure to replace <YOUR_GITHUB_USERNAME> and <YOUR_REPOSITORY_NAME> with your GitHub username and repository name in the commands above.
Deploy Uptime Kuma to Koyeb
Now that we have a repository with our Dockerfile and supporting files, we can deploy Uptime Kuma to Koyeb.
Start by logging into your Koyeb account. Follow these steps to build the Dockerfile we created and deploy the resulting container to the platform:
-
On the Overview tab of the Koyeb console, click the Create Web Service button.
-
Select GitHub as your deployment method.
-
Choose the repository containing your Uptime Kuma Docker configuration. Alternatively, you can use our public example Uptime Kuma repository by entering
https://github.com/koyeb/example-uptime-kumain the Public GitHub repository field. -
In the Builder section, select Dockerfile.
-
In the Environment variables section, click the Bulk Edit button and replace the contents with the following:
UPTIME_KUMA_PORT=8000
LITESTREAM_ACCESS_KEY_ID=
LITESTREAM_SECRET_ACCESS_KEY=
LITESTREAM_BUCKET=
LITESTREAM_PATH=uptime-kuma
LITESTREAM_URL=
LITESTREAM_REGION=
Set the variable values to reference your own information as follows:
LITESTREAM_ACCESS_KEY_ID: Set to thekeyIDfor the Backblaze API key you created.LITESTREAM_SECRET_ACCESS_KEY: Set this to theapplicationKeyfor the Backblaze API key you created.LITESTREAM_BUCKET: Set to the bucket name you created on Backblaze.LITESTREAM_PATH: Set to the directory name you want to use to store your Uptime Kuma database information. All objects created by Litestream will be placed within this directory within the bucket.LITESTREAM_URL: Prependhttps://to your Backblaze endpoint. For example, if your endpoint iss3.eu-central-003.backblazeb2.com, enterhttps://s3.eu-central-003.backblazeb2.comfor this field.LITESTREAM_REGION: Set this to the second component of your Backblaze endpoint. For example, if your endpoint iss3.eu-central-003.backblazeb2.com, the region for this field would beeu-central-003.
-
Choose a name for your App and Service and click Deploy.
Koyeb will clone the GitHub repository and use the Dockerfile to build a new container image for your project. Once the build is complete, it will start a container from it and deploy it using the configuration you included. Litestream will check the object storage bucket for an existing database and pull it if available. Afterwards, it will start Uptime Kuma and begin streaming the database to the storage bucket.
Configure Uptime Kuma
Once Uptime Kuma is up and running, you can visit your Koyeb Service's subdomain (you can find this on your Service's page) to connect. It will have the following format:
https://<YOUR_APP_NAME>-<KOYEB_ORG_NAME>.koyeb.app
Set up the admin account
When you visit Uptime Kuma's URL, you will be redirected to a page where you can create an admin account.
Fill out the form with your information to configure access:
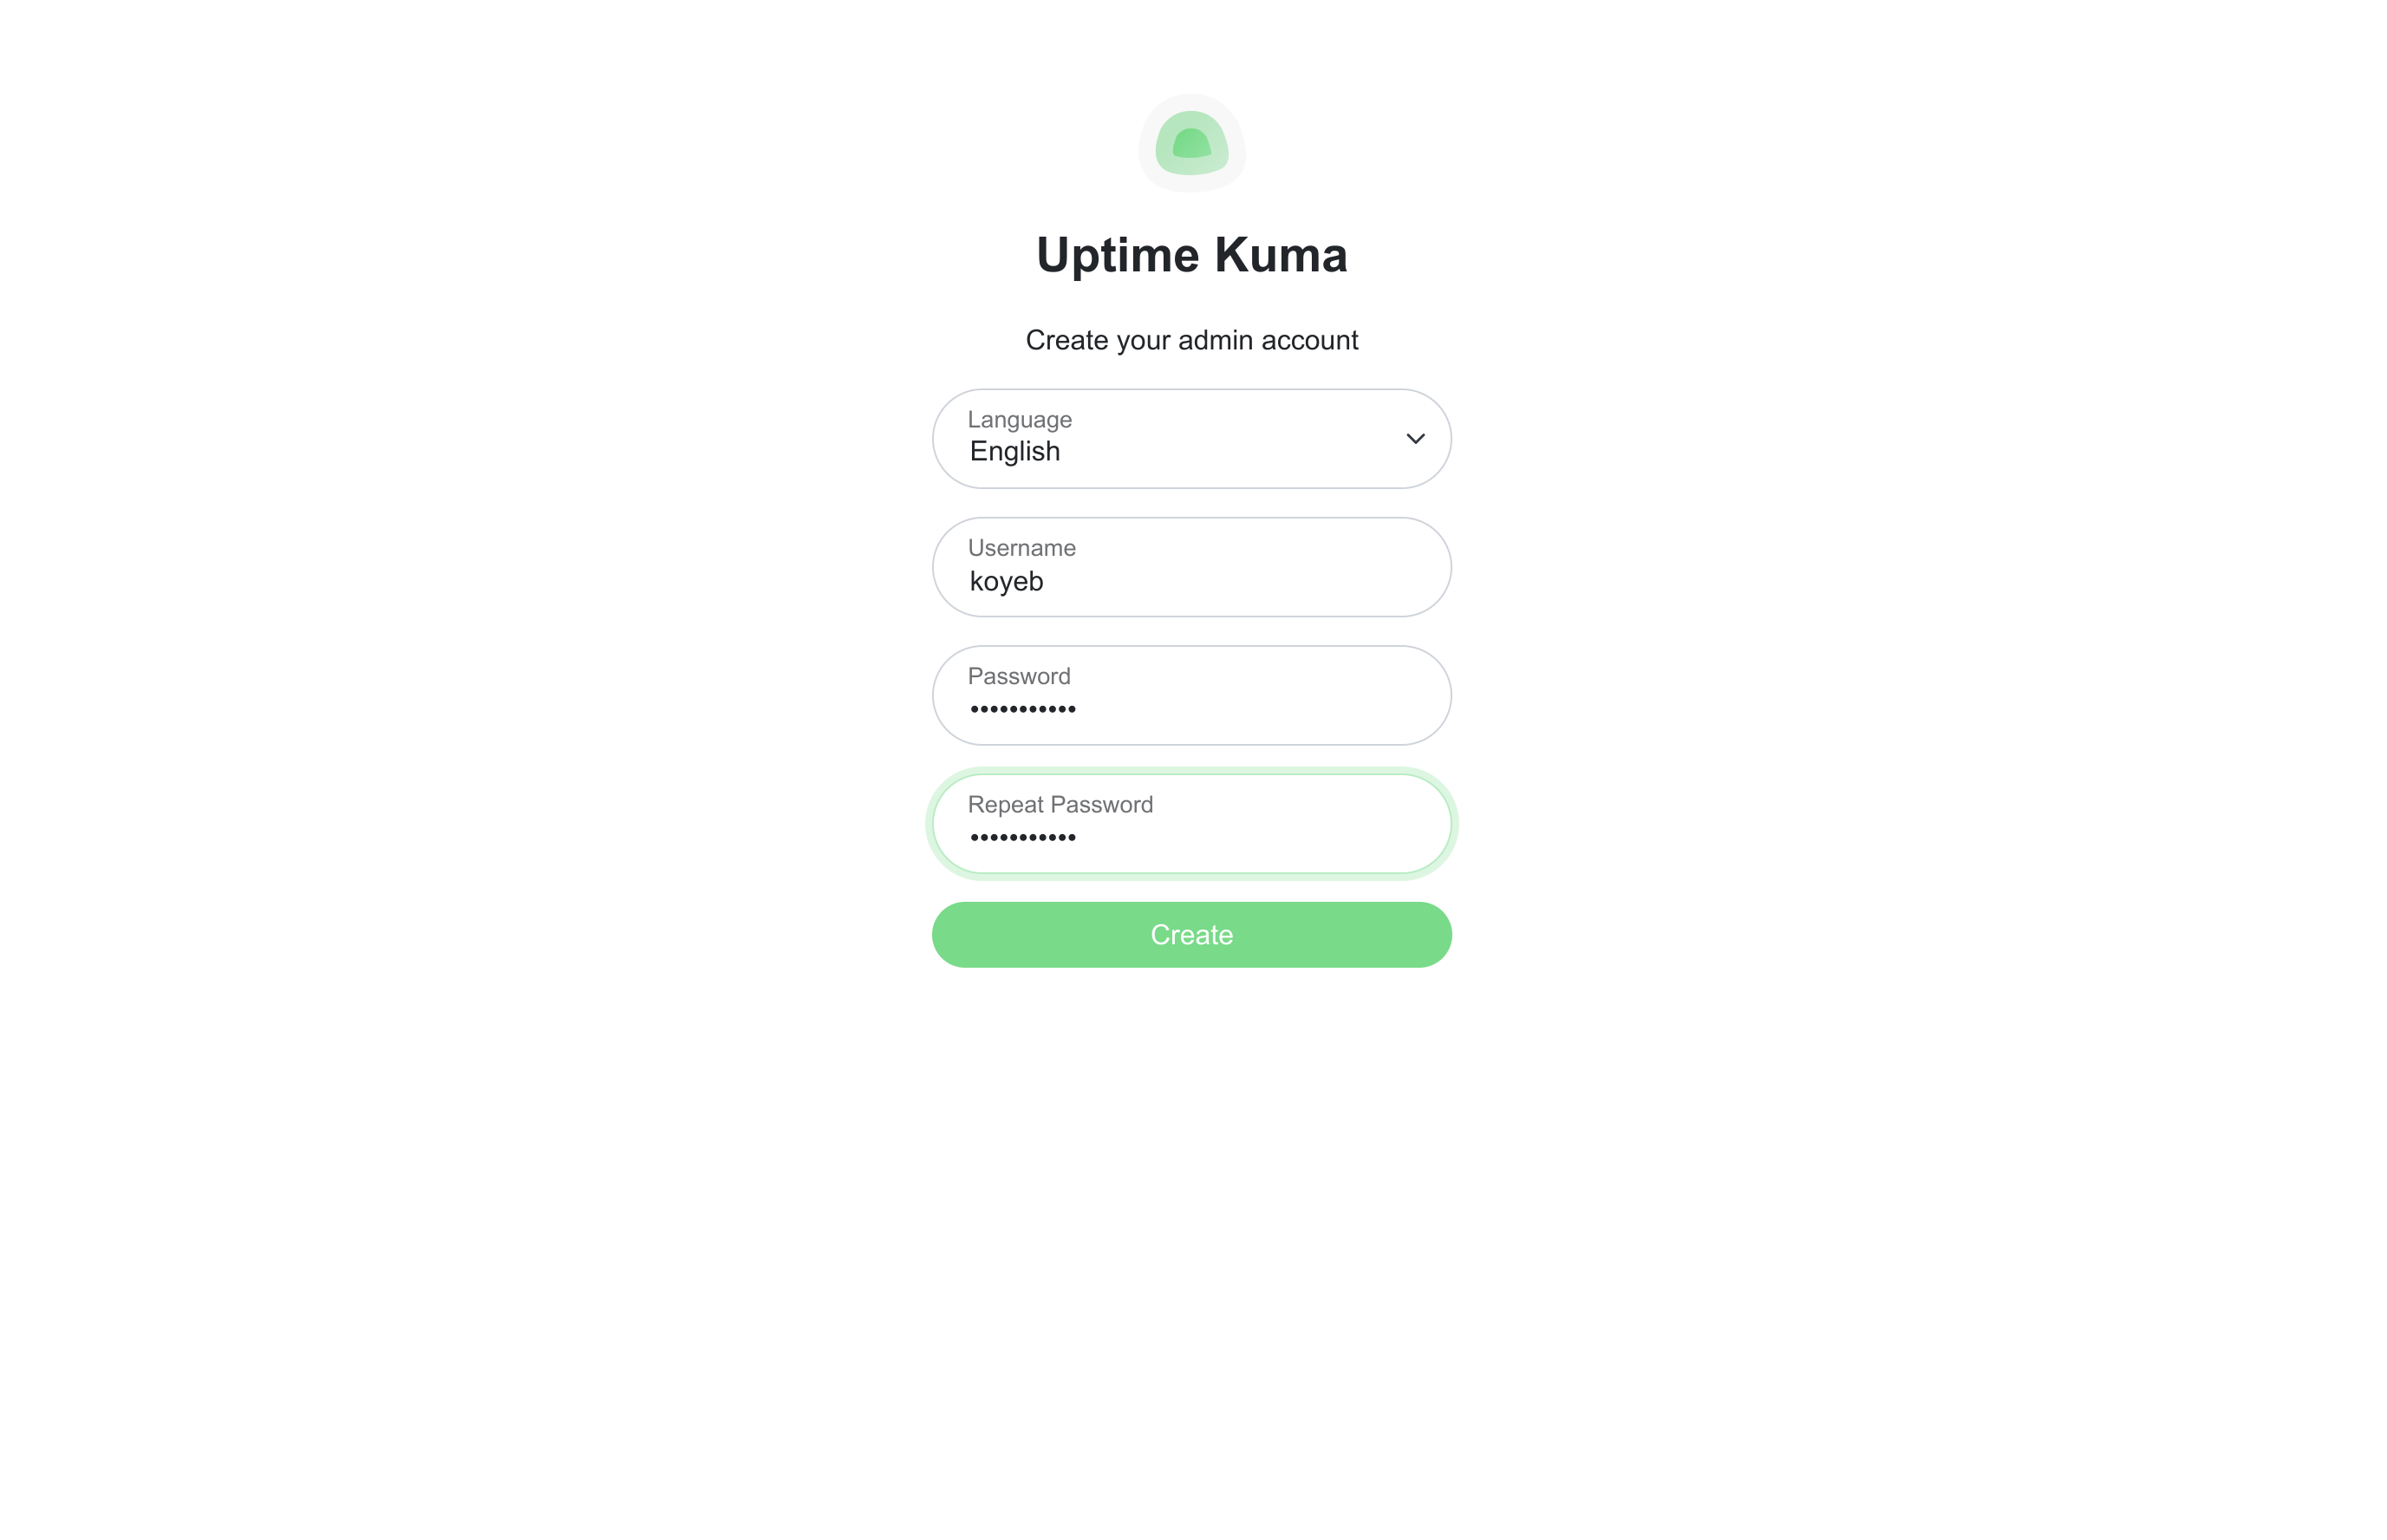
Click Create when you are finished.
You will be logged in with the information you submitted and redirected to the primary Uptime Kuma dashboard:
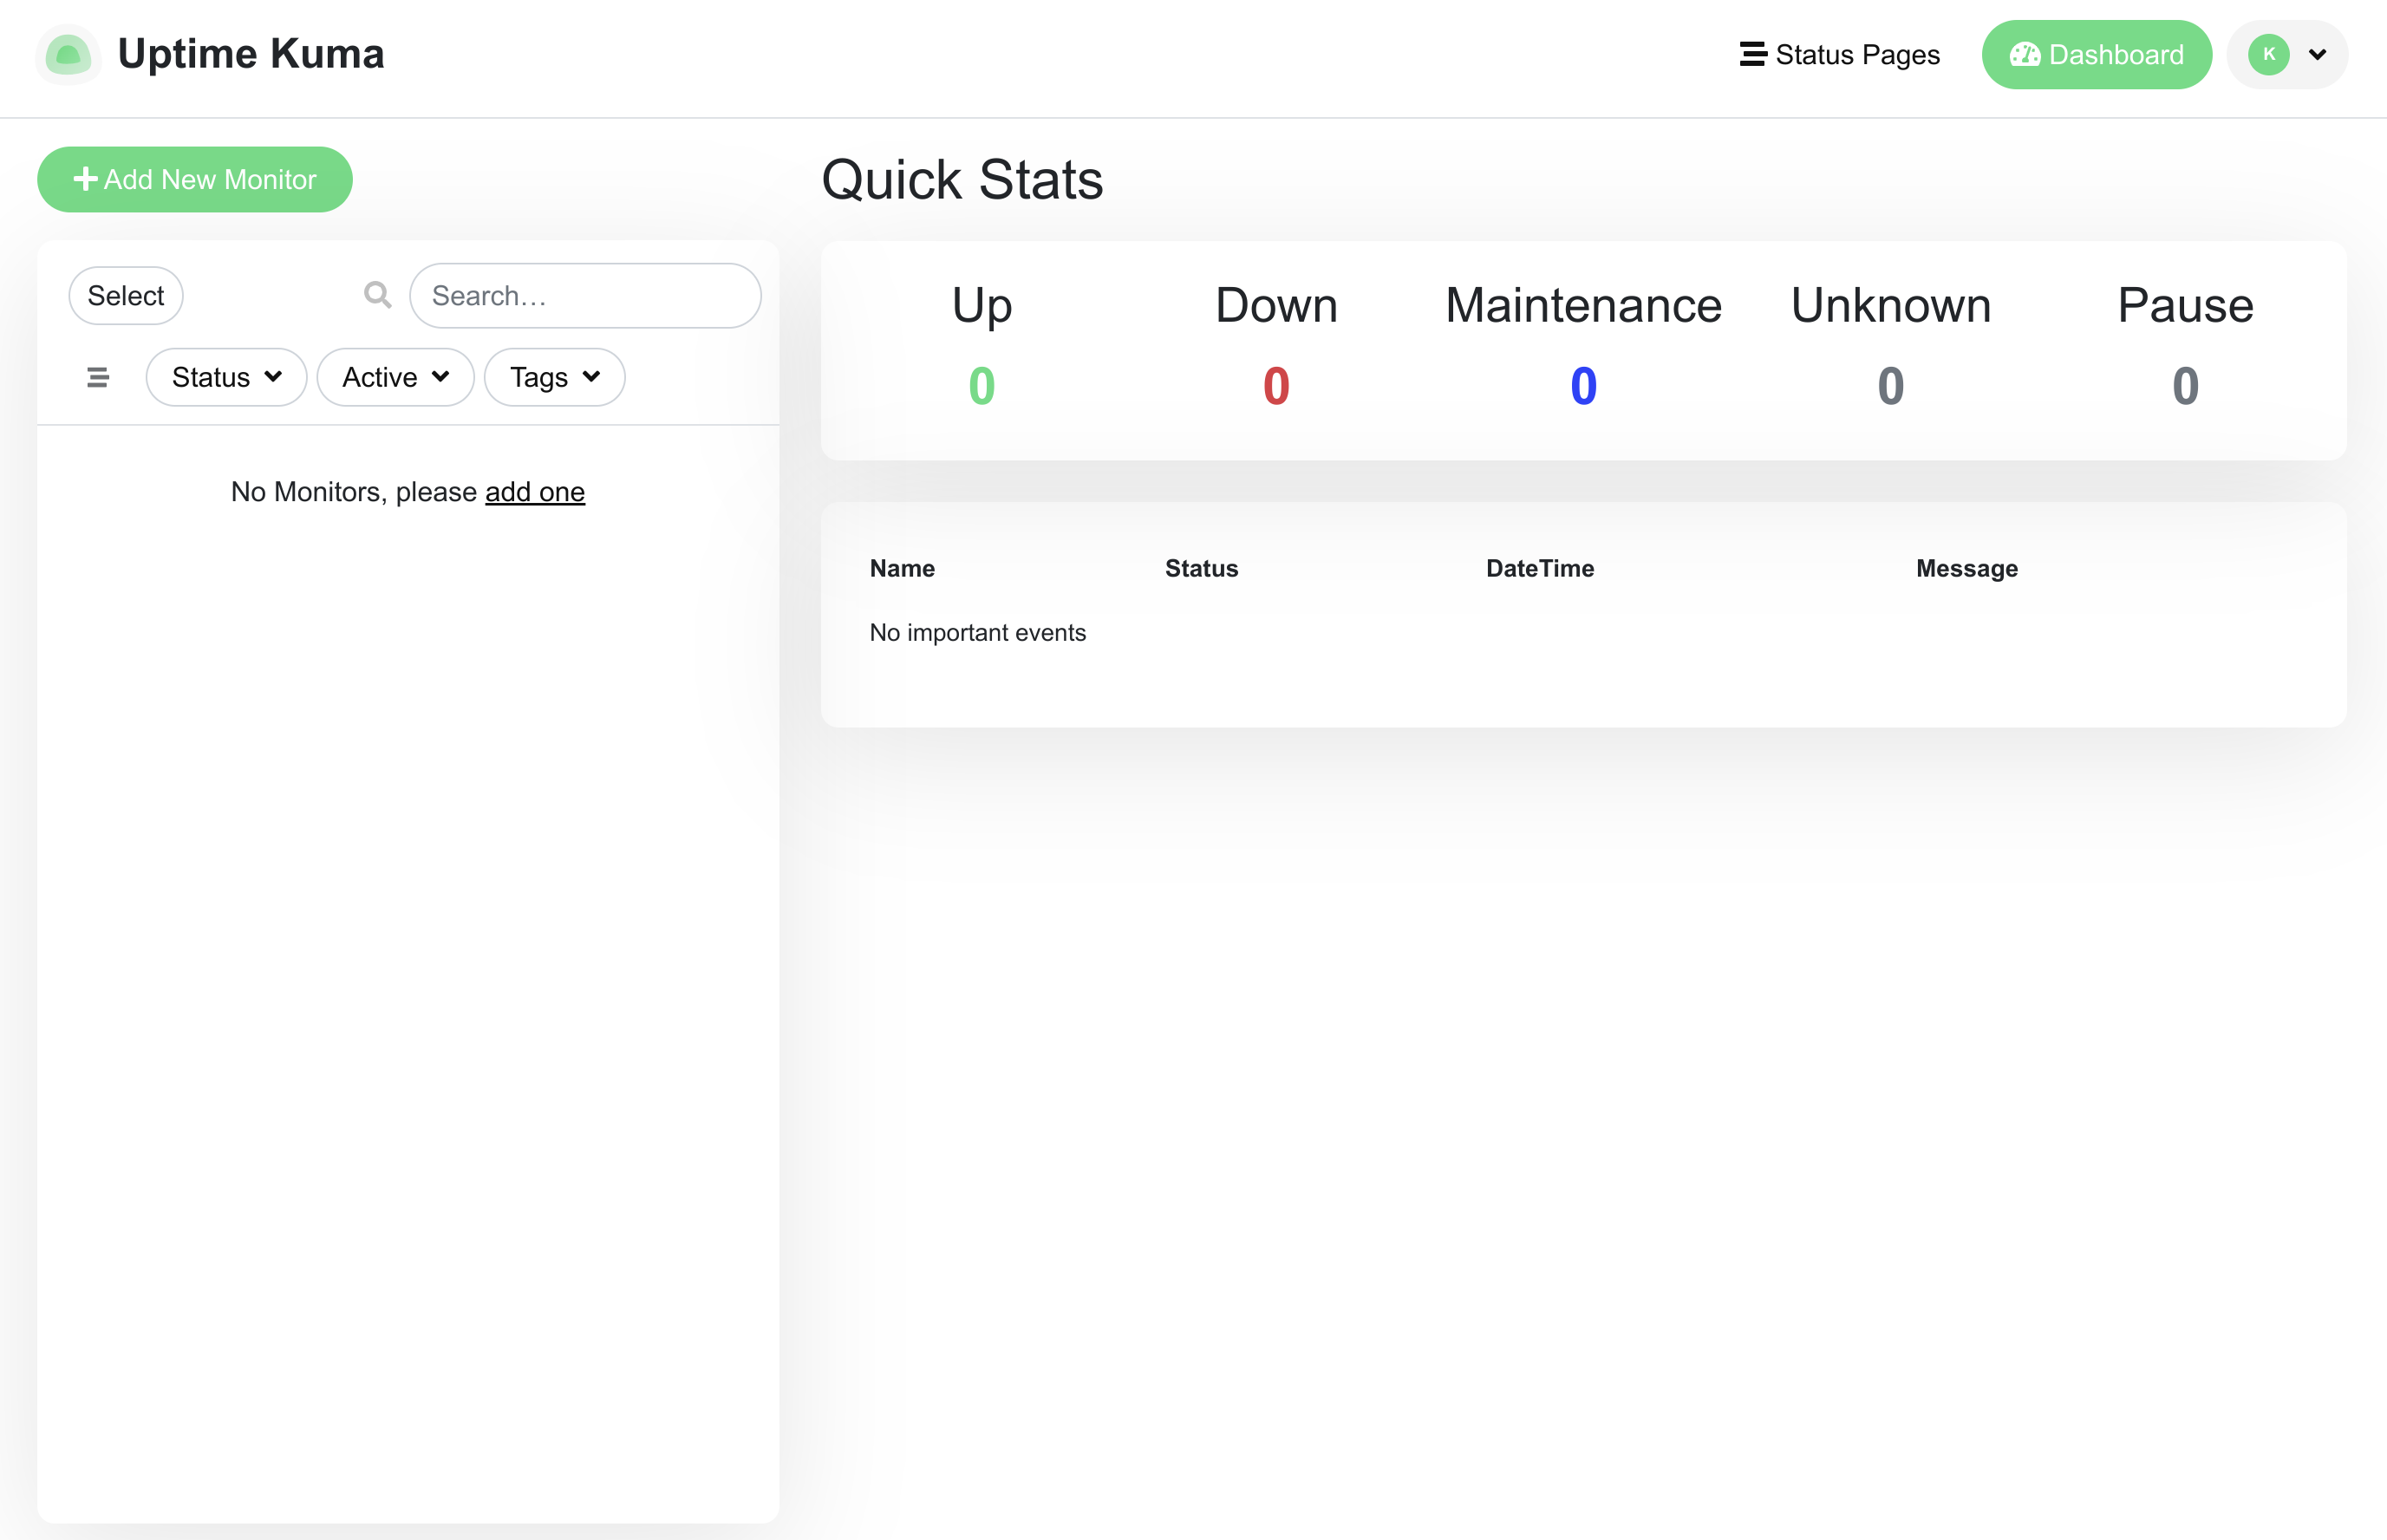
Now that we have an account, we can begin configuring Uptime Kuma.
Configure SMTP notifications
The first thing we will do is configure our account to send email notifications in case any of our services are experiencing problems.
To start, click the drop-down menu in the upper right corner and then select Settings. In the settings menu, select the Notifications page to go to the notifications configuration:
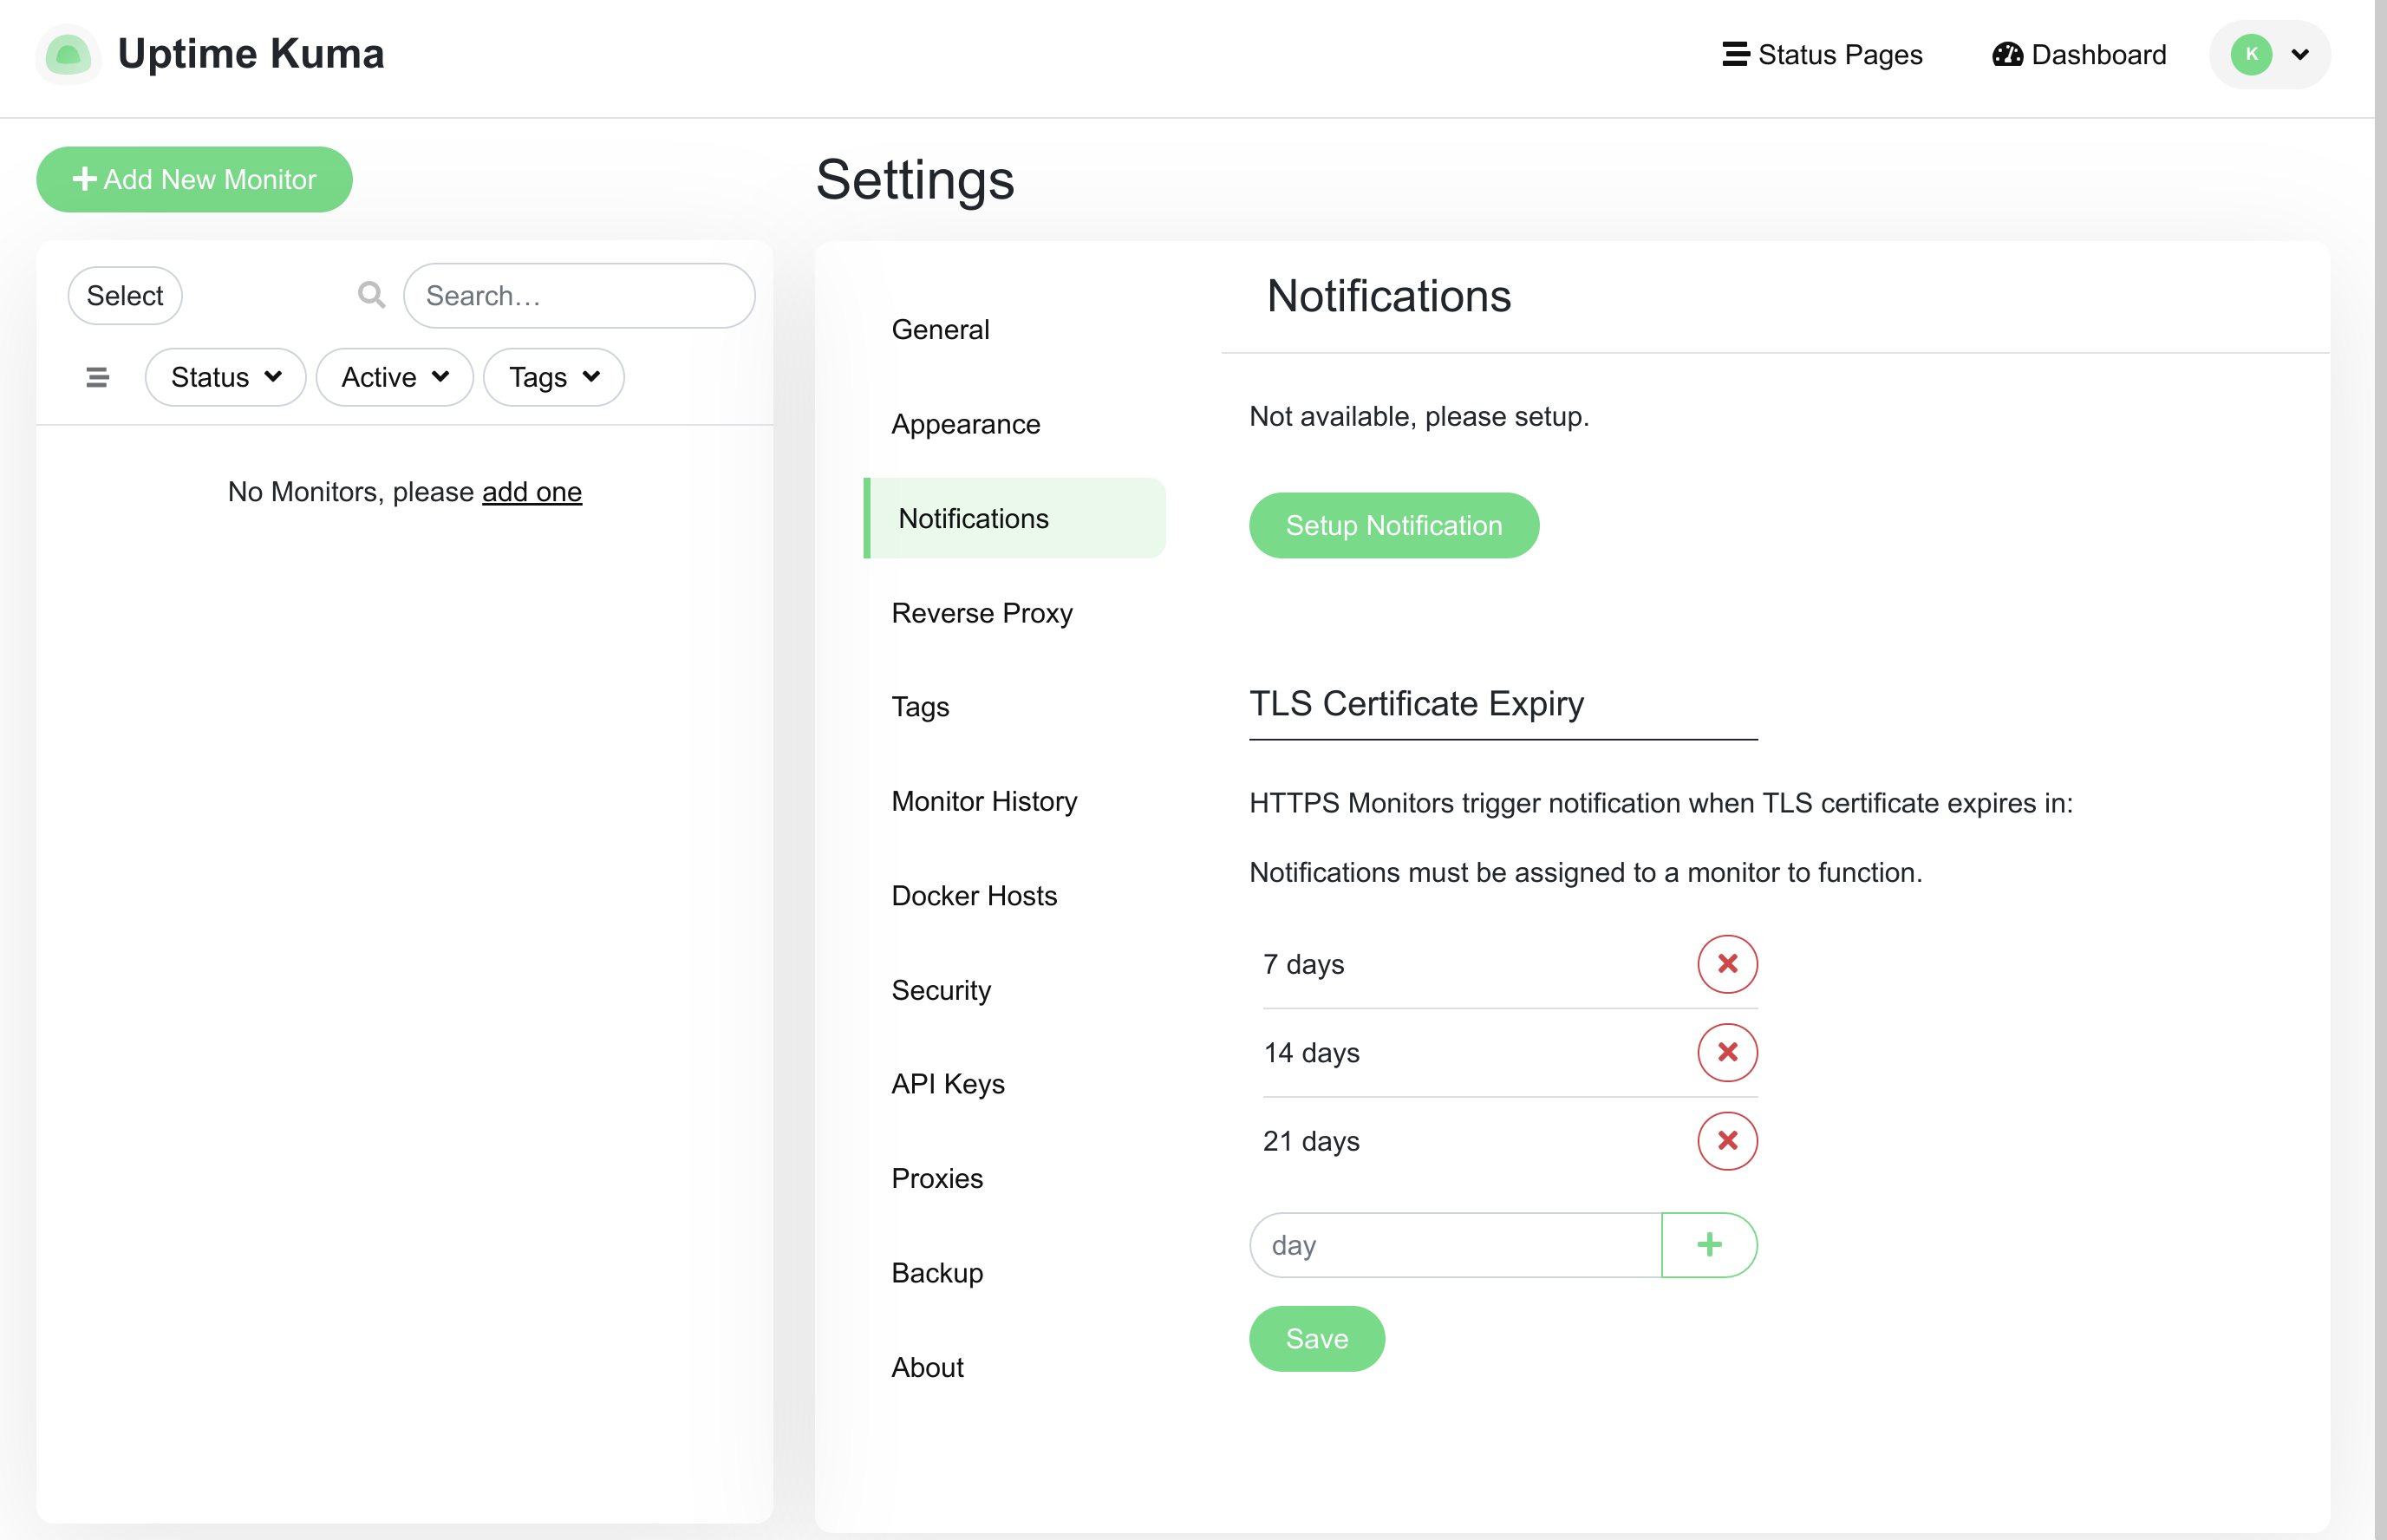
Click Setup Notification to begin configuring a new notification.
A form will appear allowing you to configure a new notification:
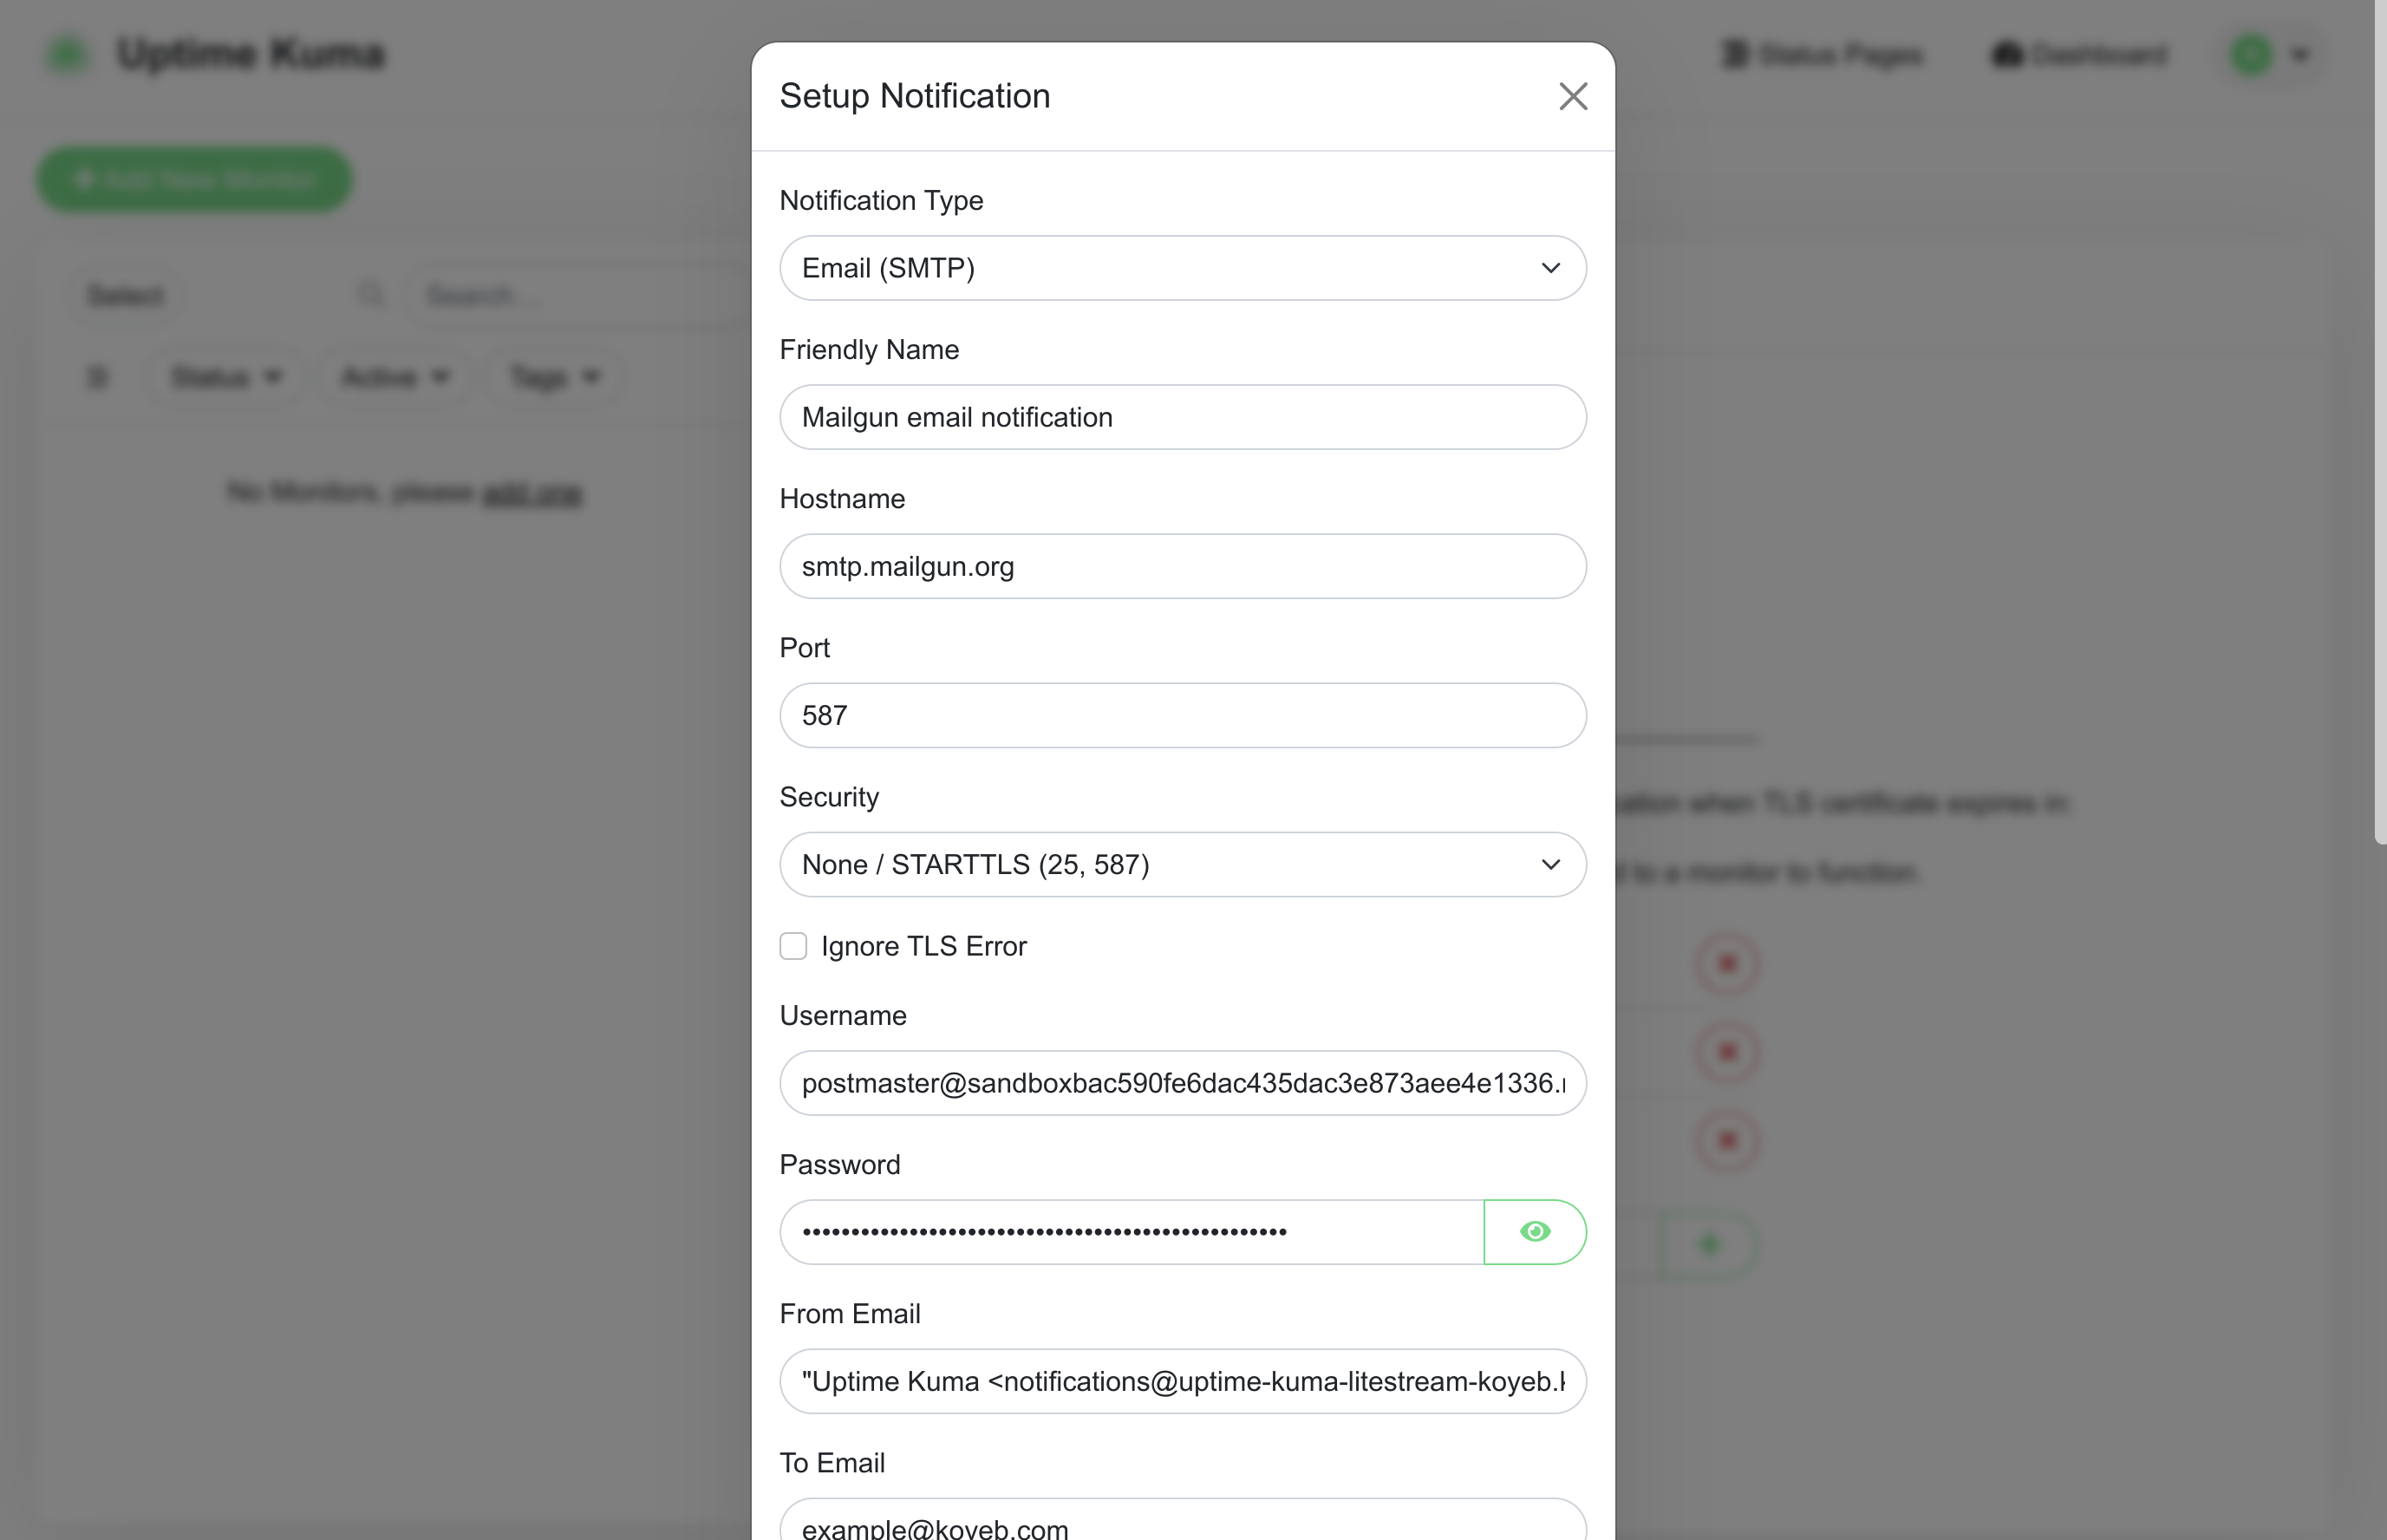
Configure the notification with the following details:
- Notification Type: "Email (SMTP)"
- Friendly Name: A descriptive name that will help you distinguish this notification.
- Hostname: The hostname you copied from your Mailgun account (
smtp.mailgun.org). - Port: The recommended port for Mailgun's SMTP server (587)
- Security: "None / STARTTLS (25, 587)"
- Ignore TLS Error? Leave unchecked.
- Username: The username you copied from Mailgun's SMTP settings. This should start with
postmaster@and be an email address. - Password: The SMTP password you copied from Mailgun's SMTP settings.
- From email: The "from" field you'd like to use for the generated emails. This takes the form of a human-readable name in double quotes followed by an email address enclosed in angle brackets. Use your Koyeb Service's subdomain as the domain portion of the email. An example entry would be:
"Uptime Kuma" <notifications@YOUR_KOYEB_SERVICE.koyeb.app> - To email: The authorized email account you configured in Mailgun.
- Default enabled? Check this to add this to all future monitors.
You can leave the other settings untouched.
When you are finished, click Test at the bottom of the form to attempt to send a test email. Check the account for an email from Uptime Kuma. You also might want to look in your spam folder since we are sending email from a sandbox domain.
If everything worked correctly, click Save to save your settings.
Create a new monitor
Now that email is configured, we can create a new monitor to test service monitoring.
Click Add New Monitor in the upper left corner of the dashboard to begin:
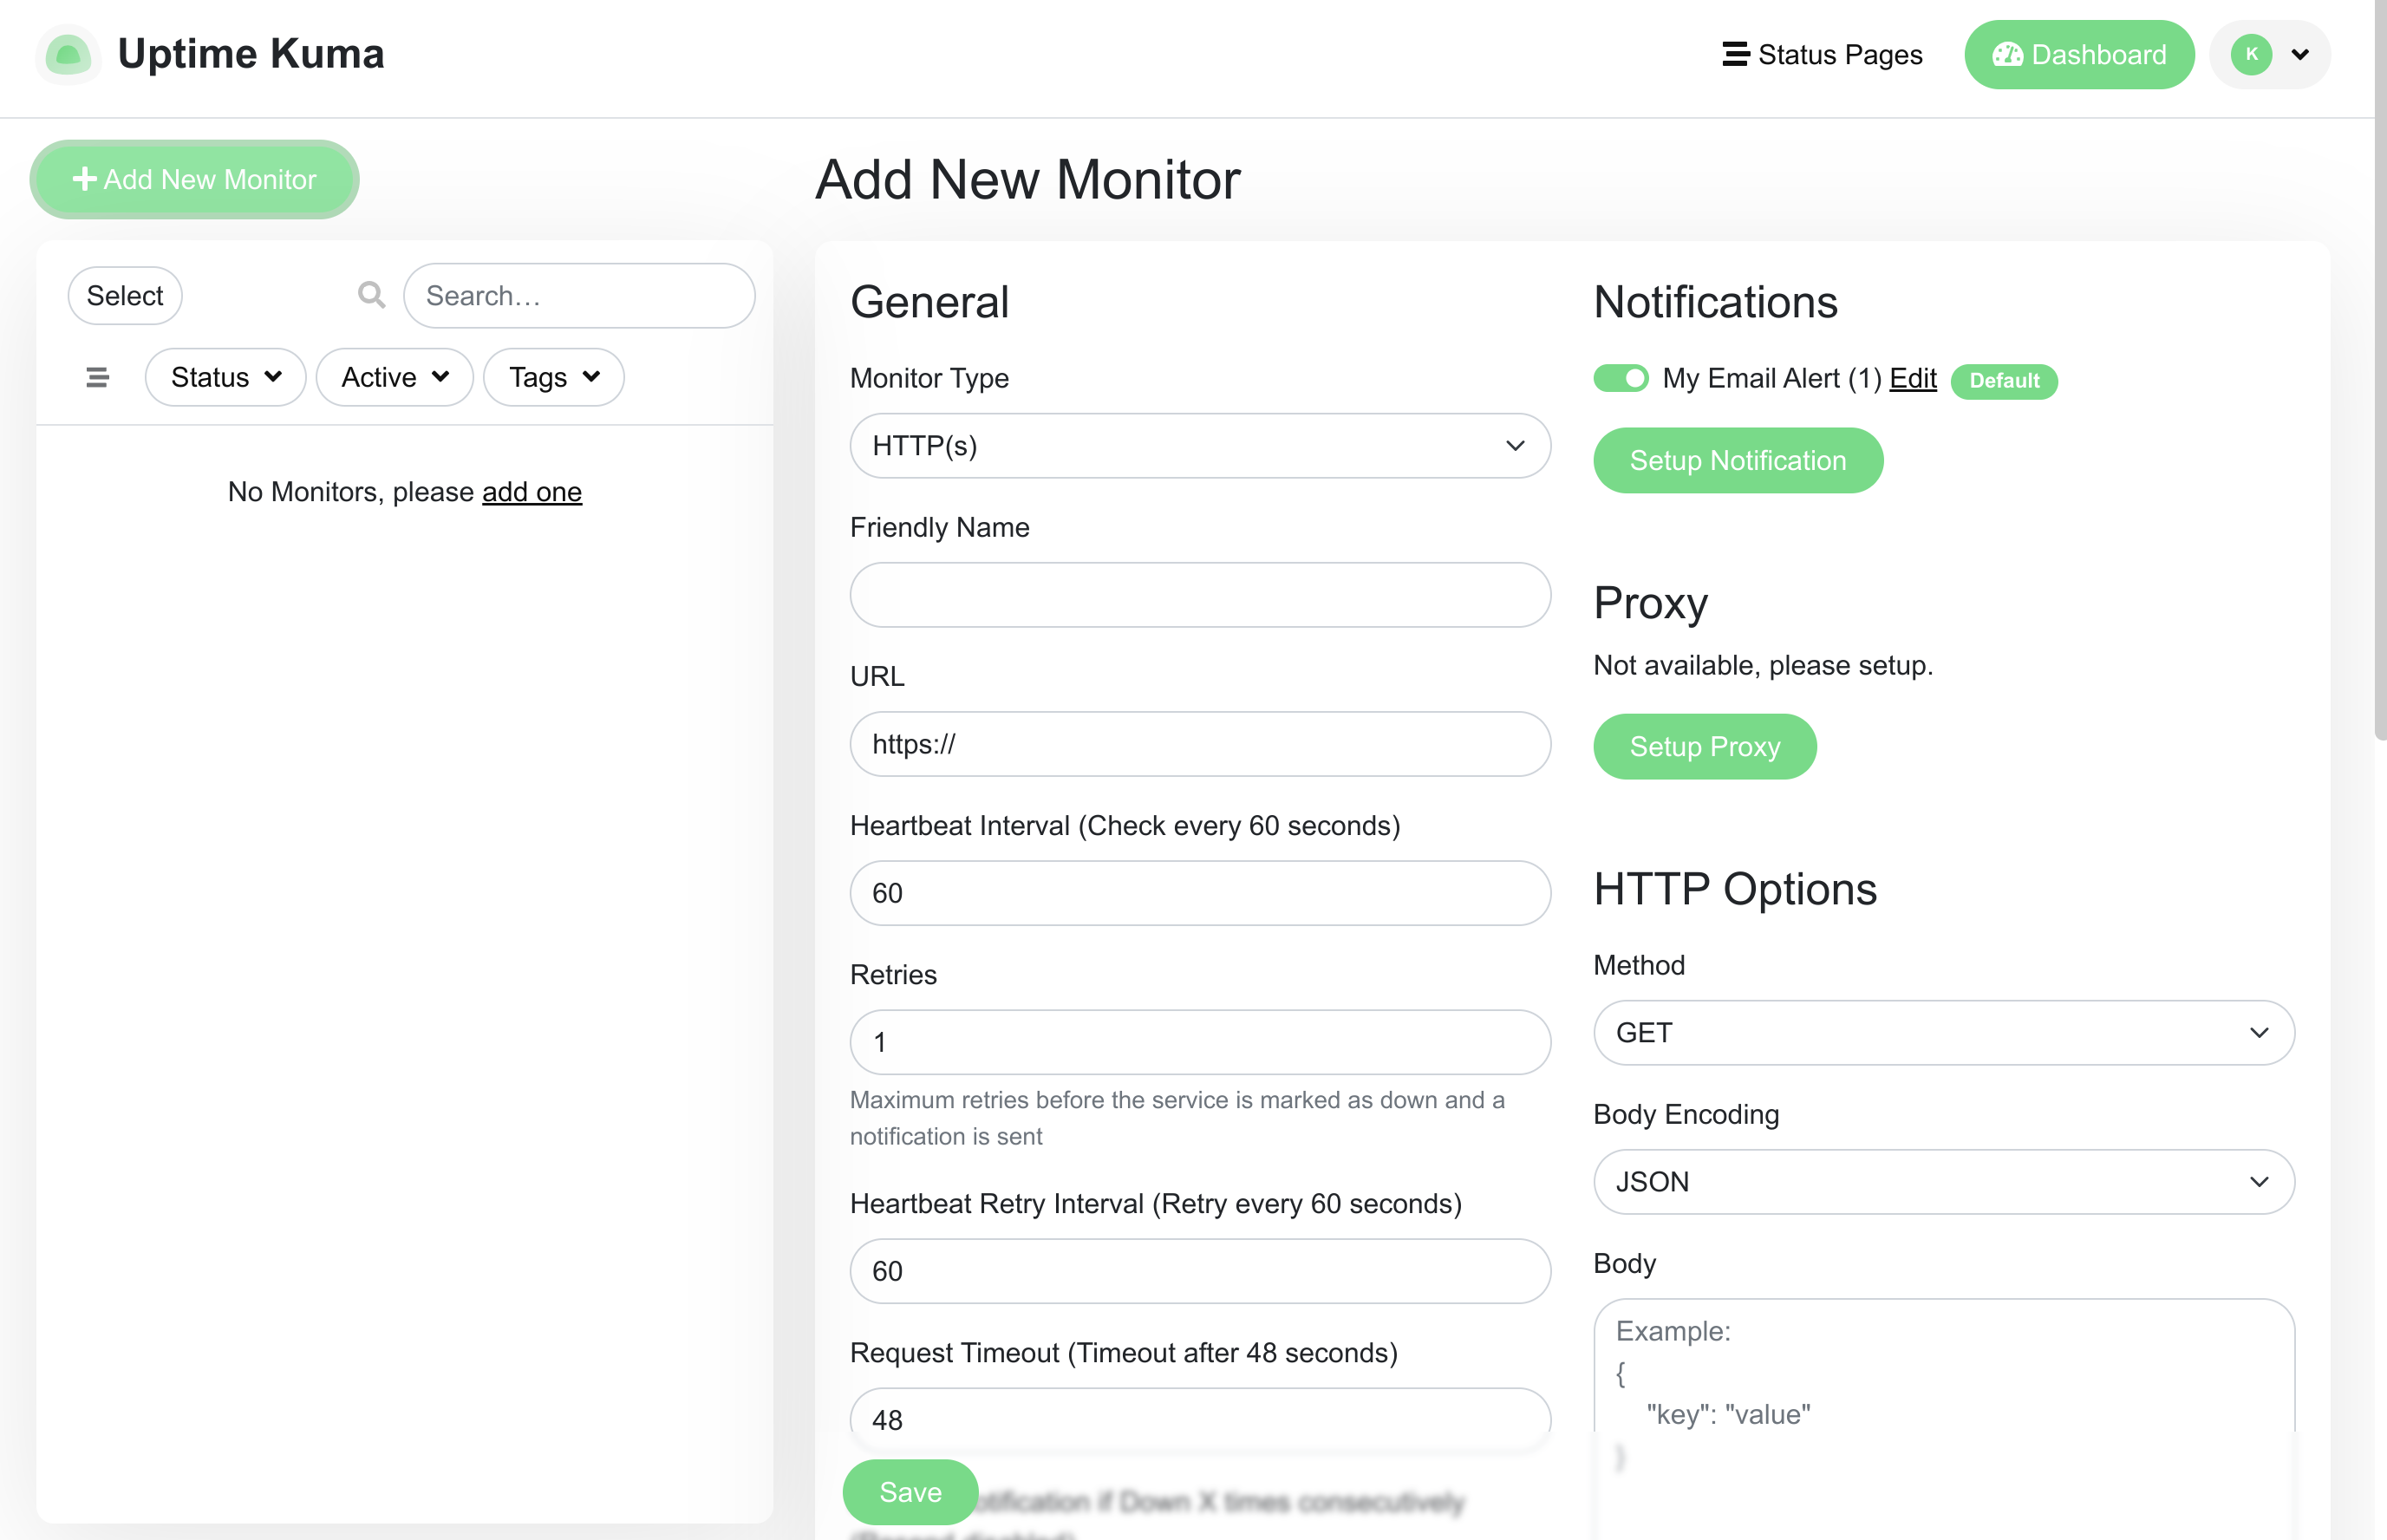
The first thing you might notice is that, because we configured our notification to be enabled by default, it is selected automatically in the new monitor form.
As a demonstration, we'll be configuring a basic monitor for the Koyeb website. We can do this by configuring the following options:
- Monitor Type: HTTP(s)
- Friendly Name: A descriptive name that will help you distinguish this monitor.
- URL: The URL to connect to. In our case, this should be
https://thekoyeb.com. - Description: A human-friendly description to provide additional details about what is being monitored.
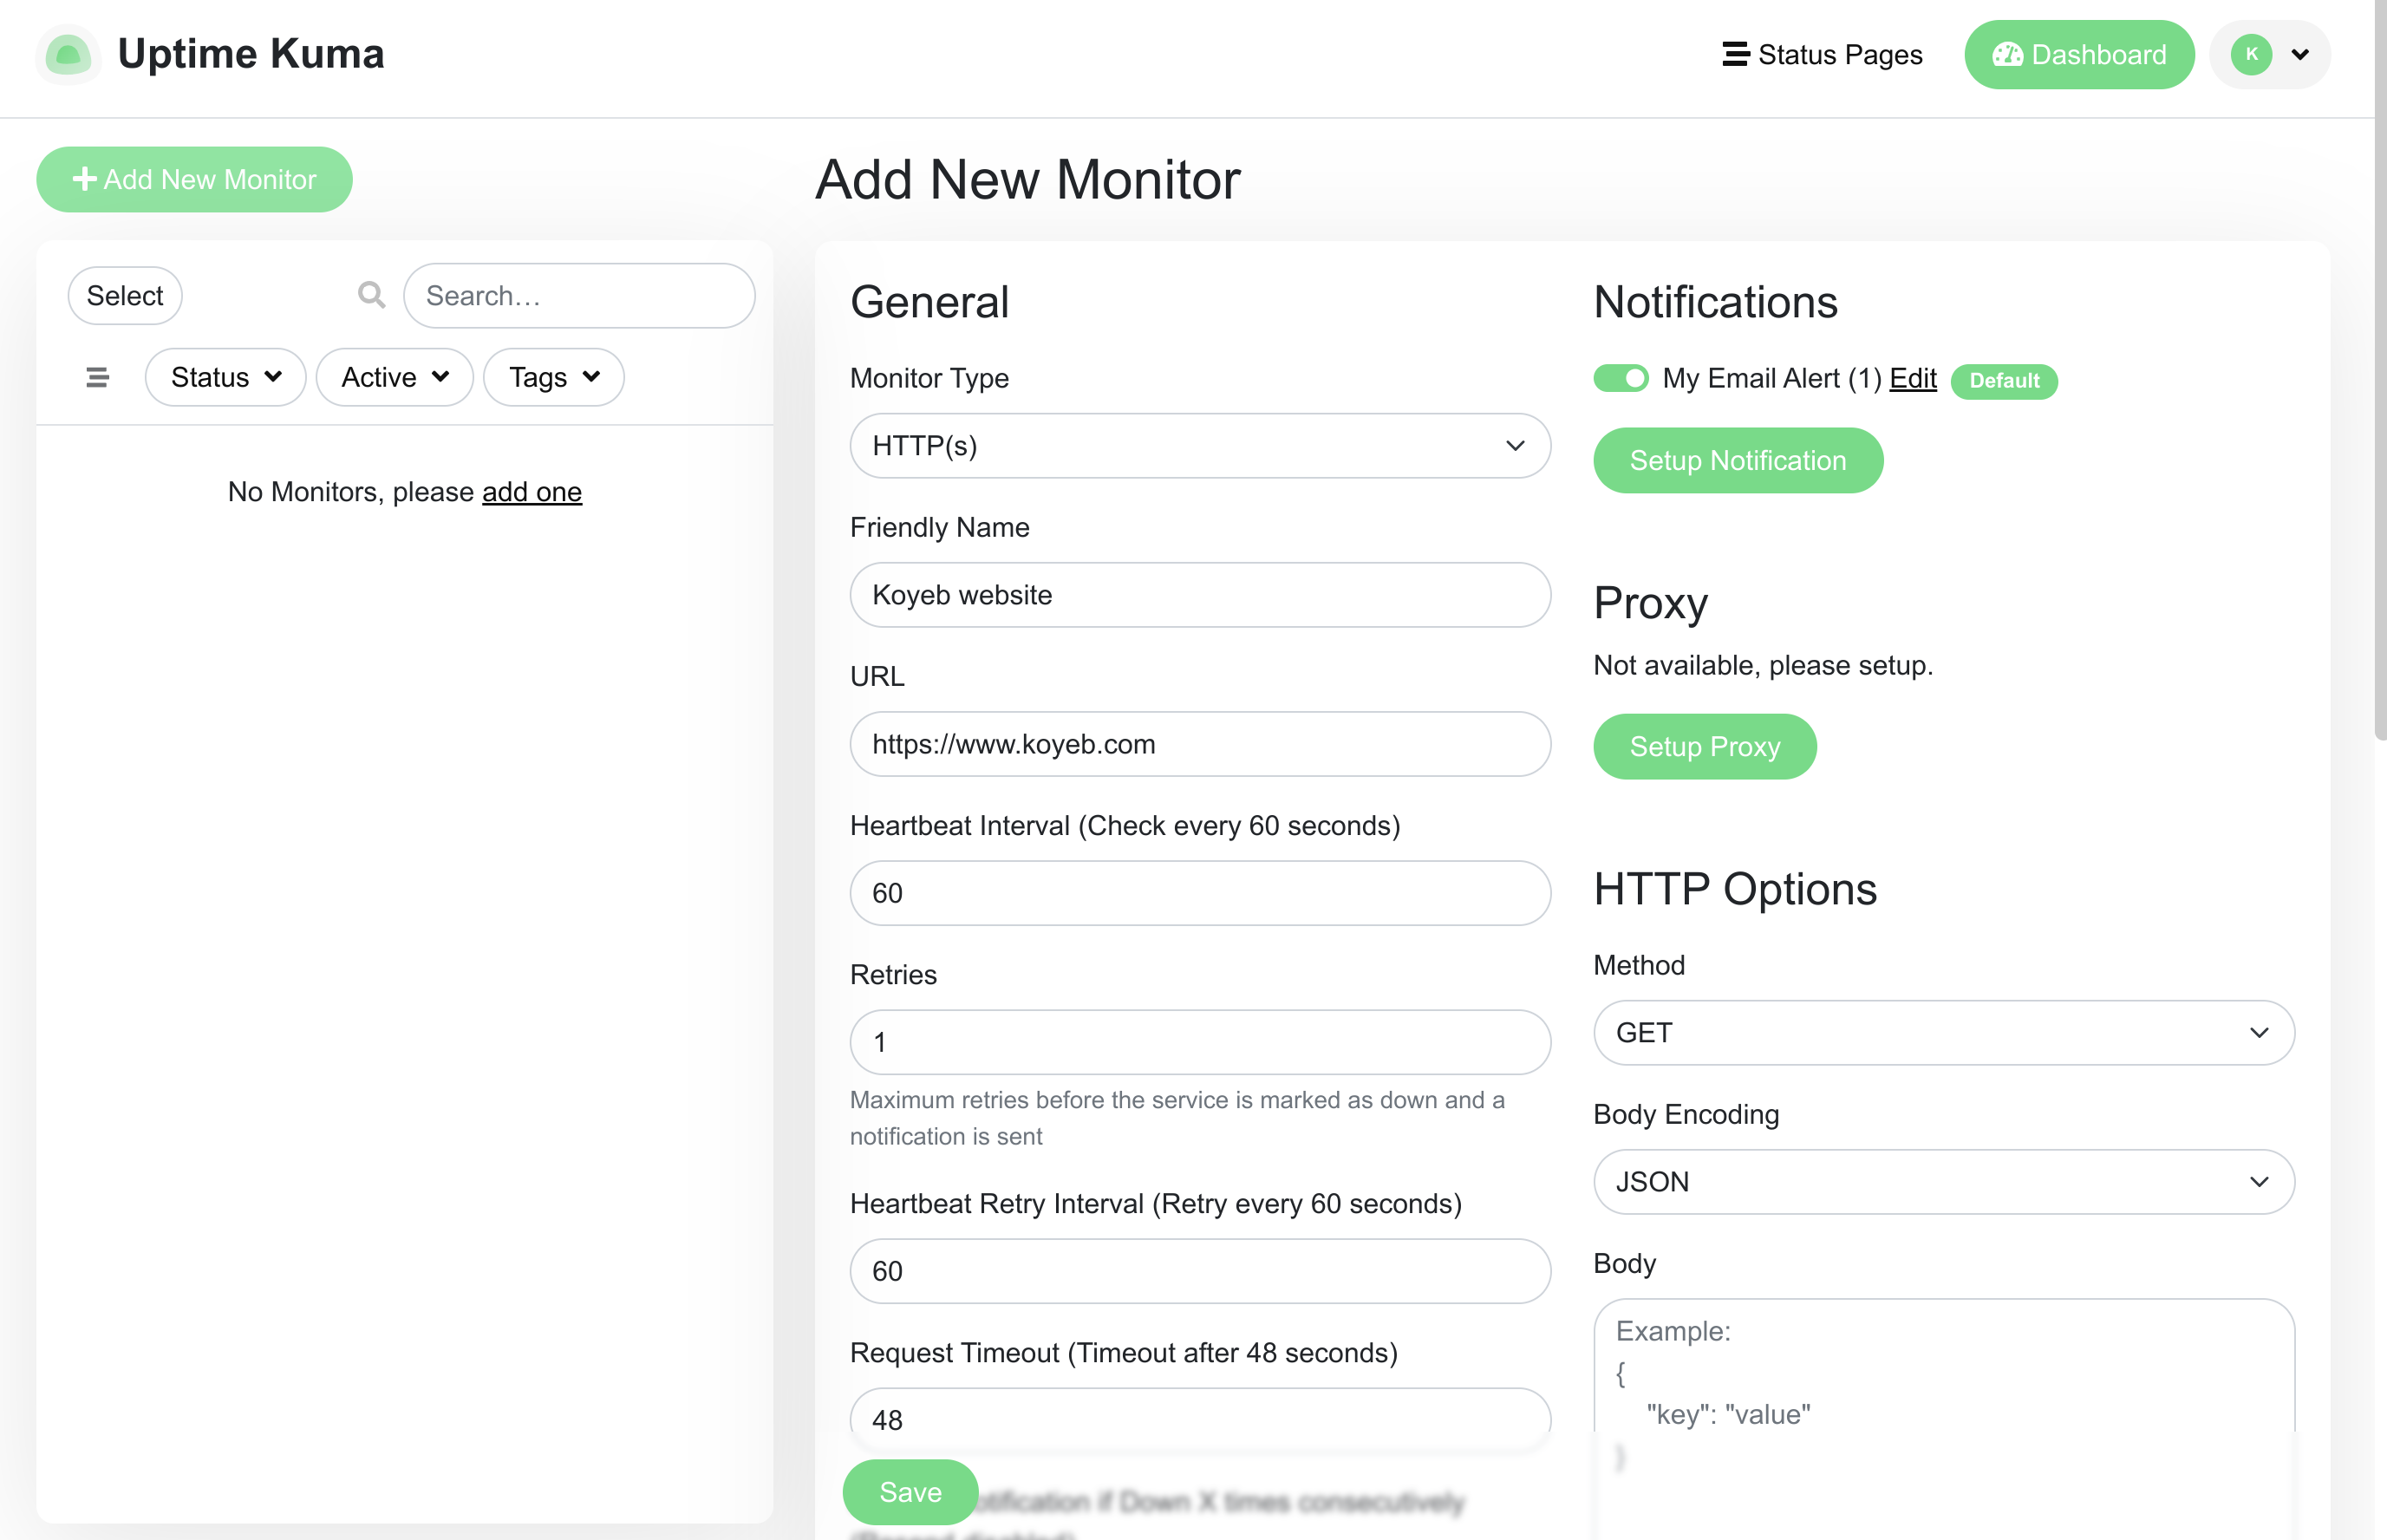
You can configure other values as you'd prefer, but the above is enough to get started. Click Save when you are finished.
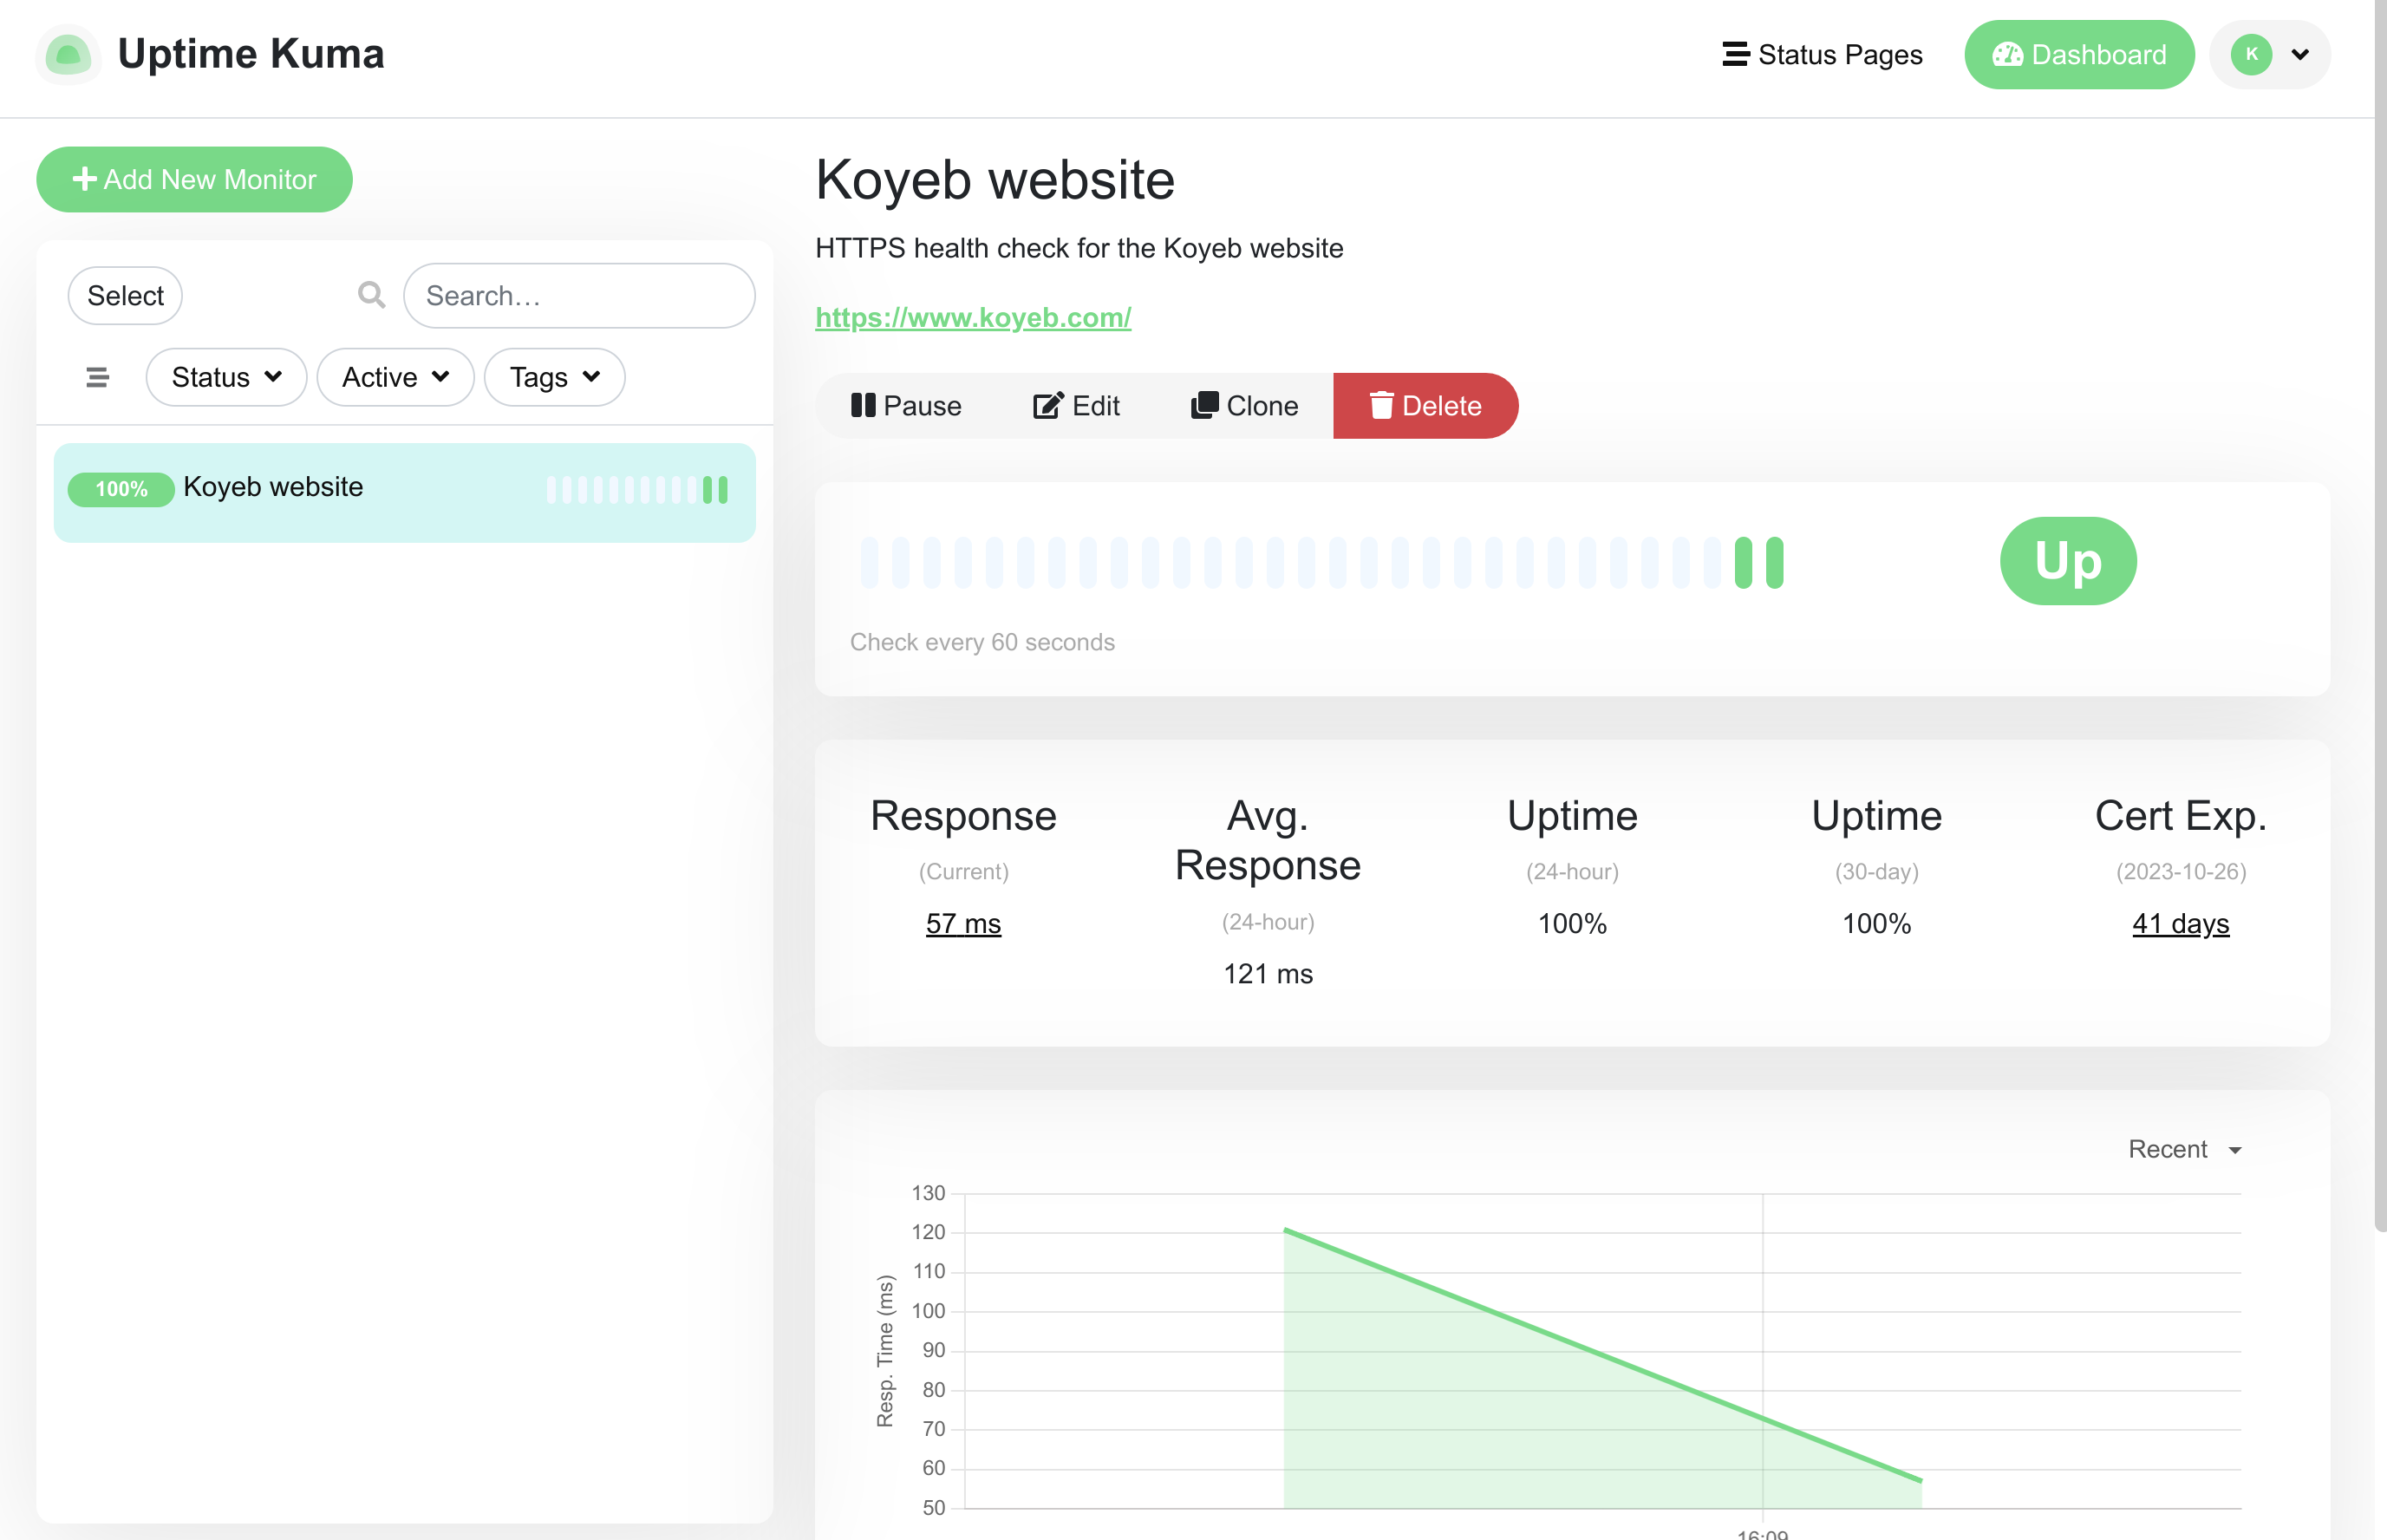
You will be redirected to your new monitor where Uptime Kuma has already started to check the site availability:
Create a public status page
Now that we have something to monitor, we can configure a public status page. Users can use this to see the health status of the configured services and get informed about any incidents that might be occurring.
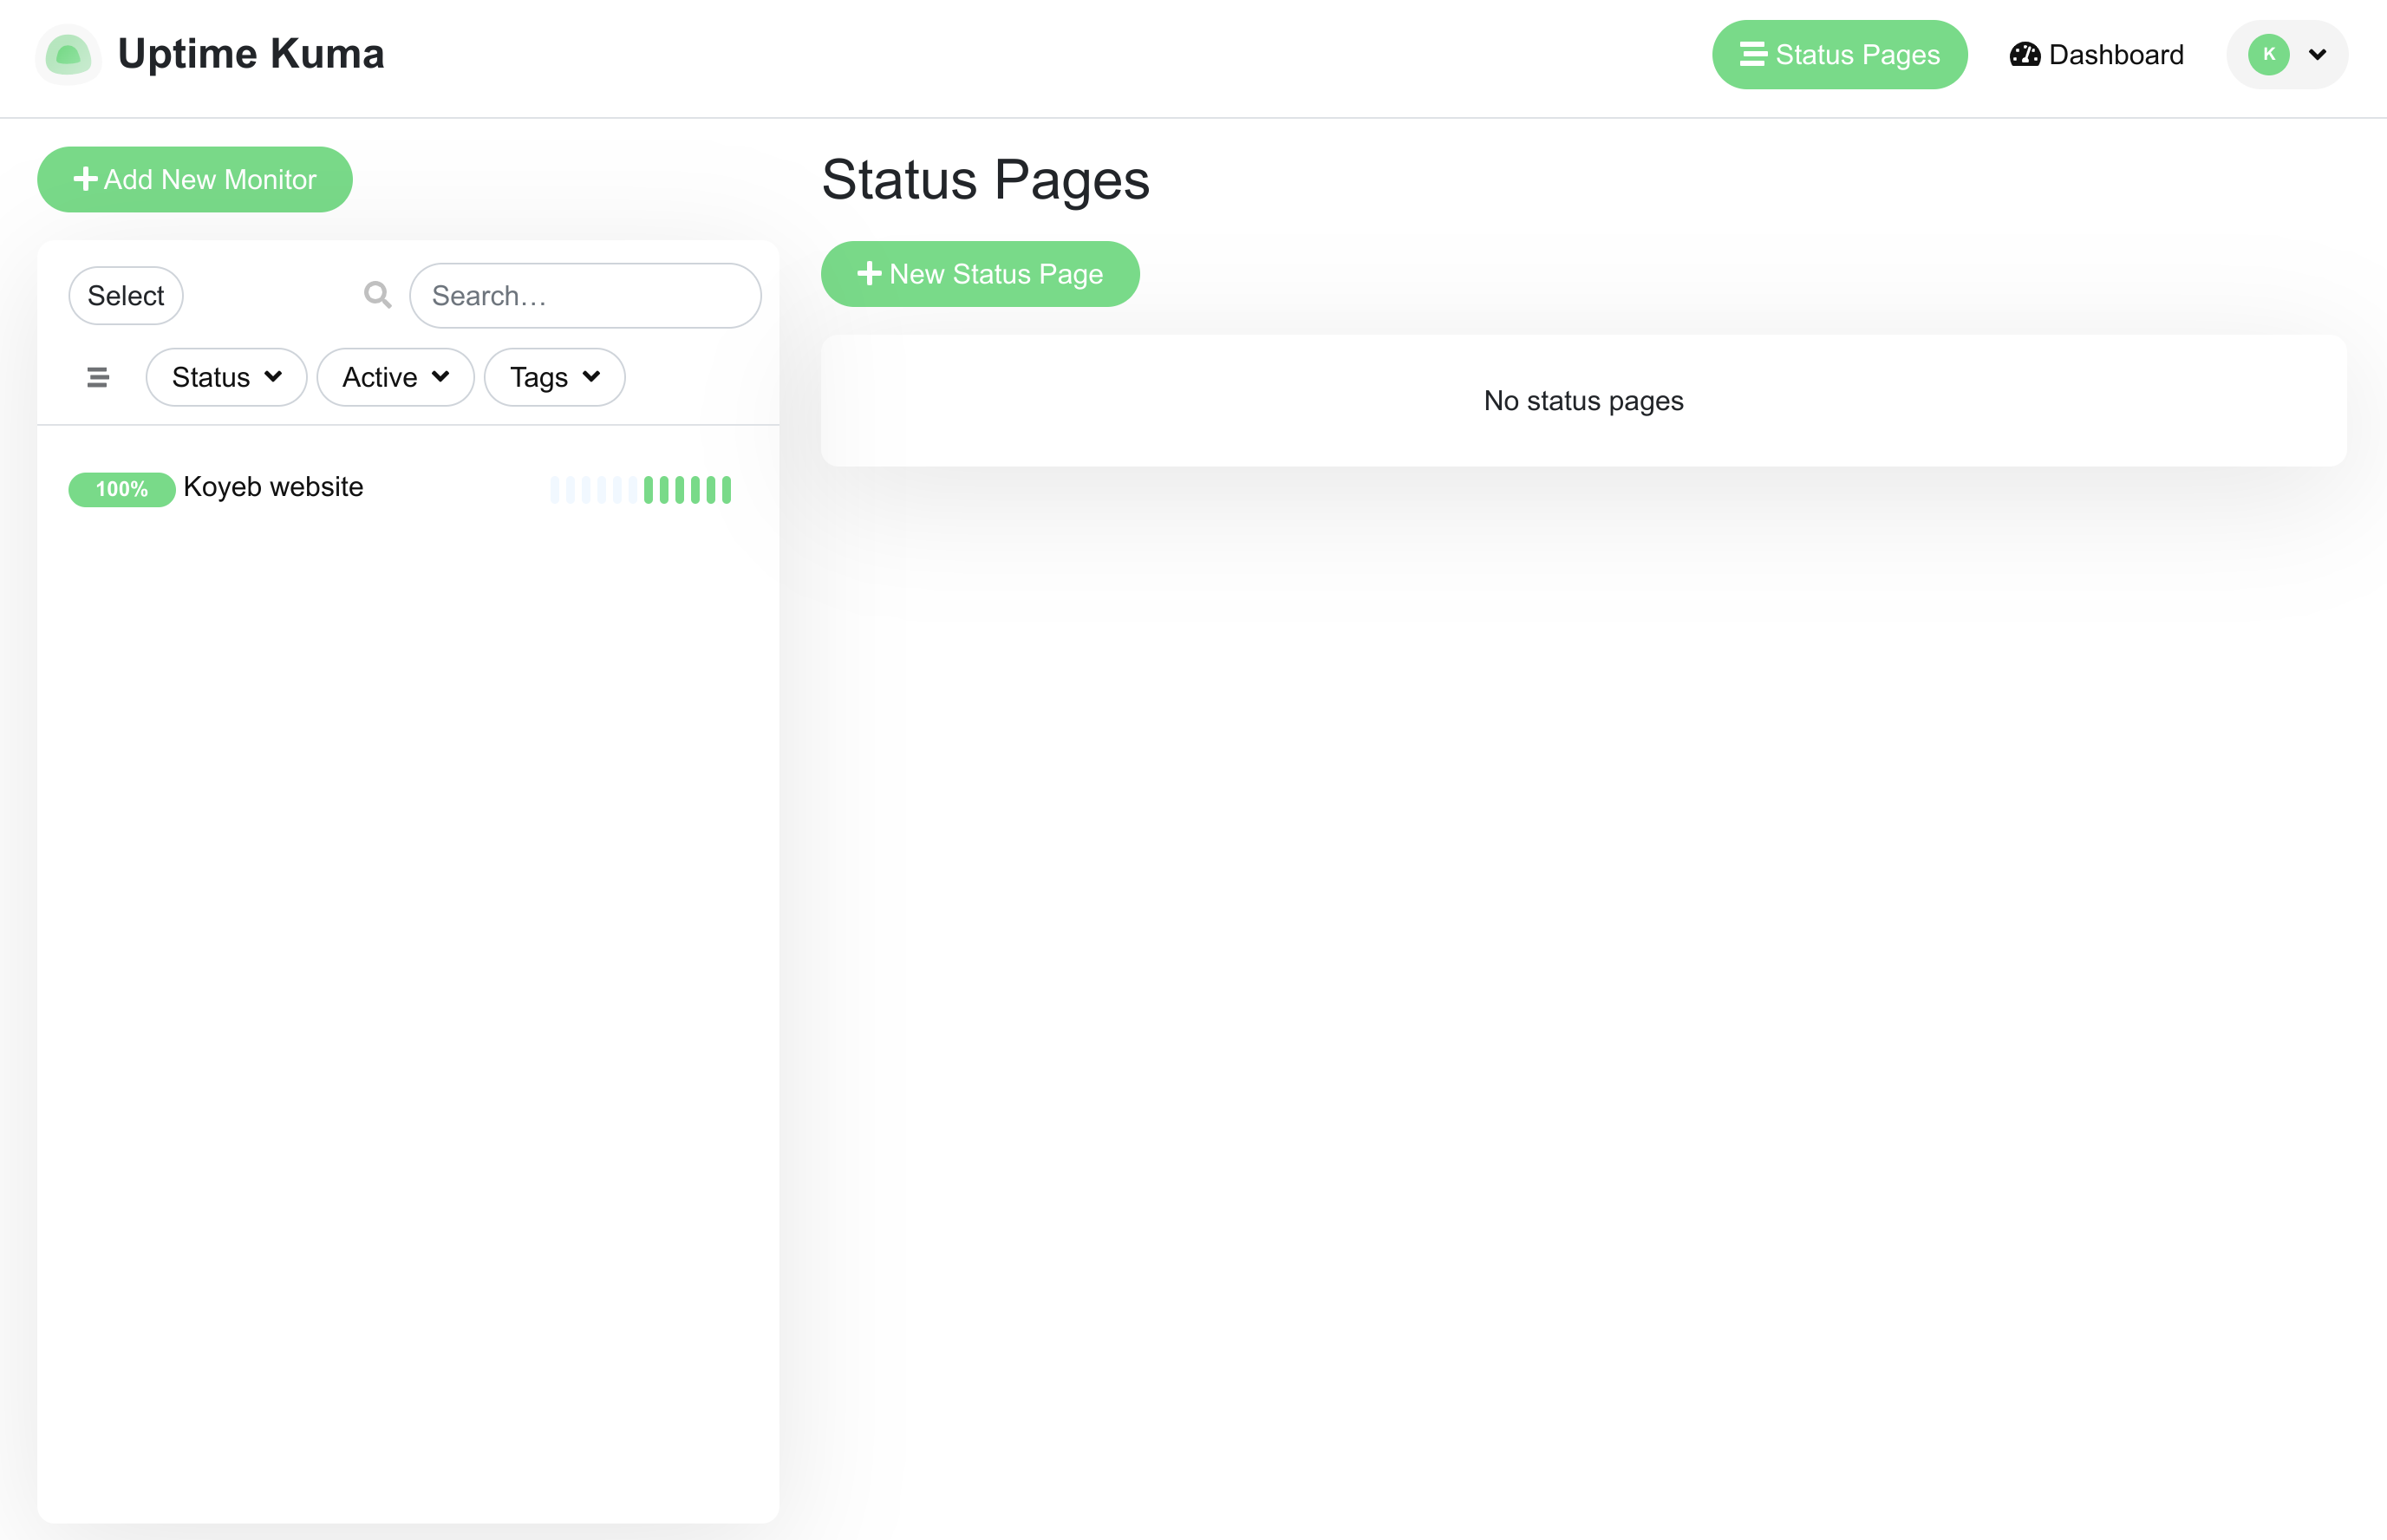
To create a new status page, click Status Pages in the top navigation bar and then click New Status Page on the page that follows:
Choose a name for the new status page and give it a URL slug appropriate for what it will display:
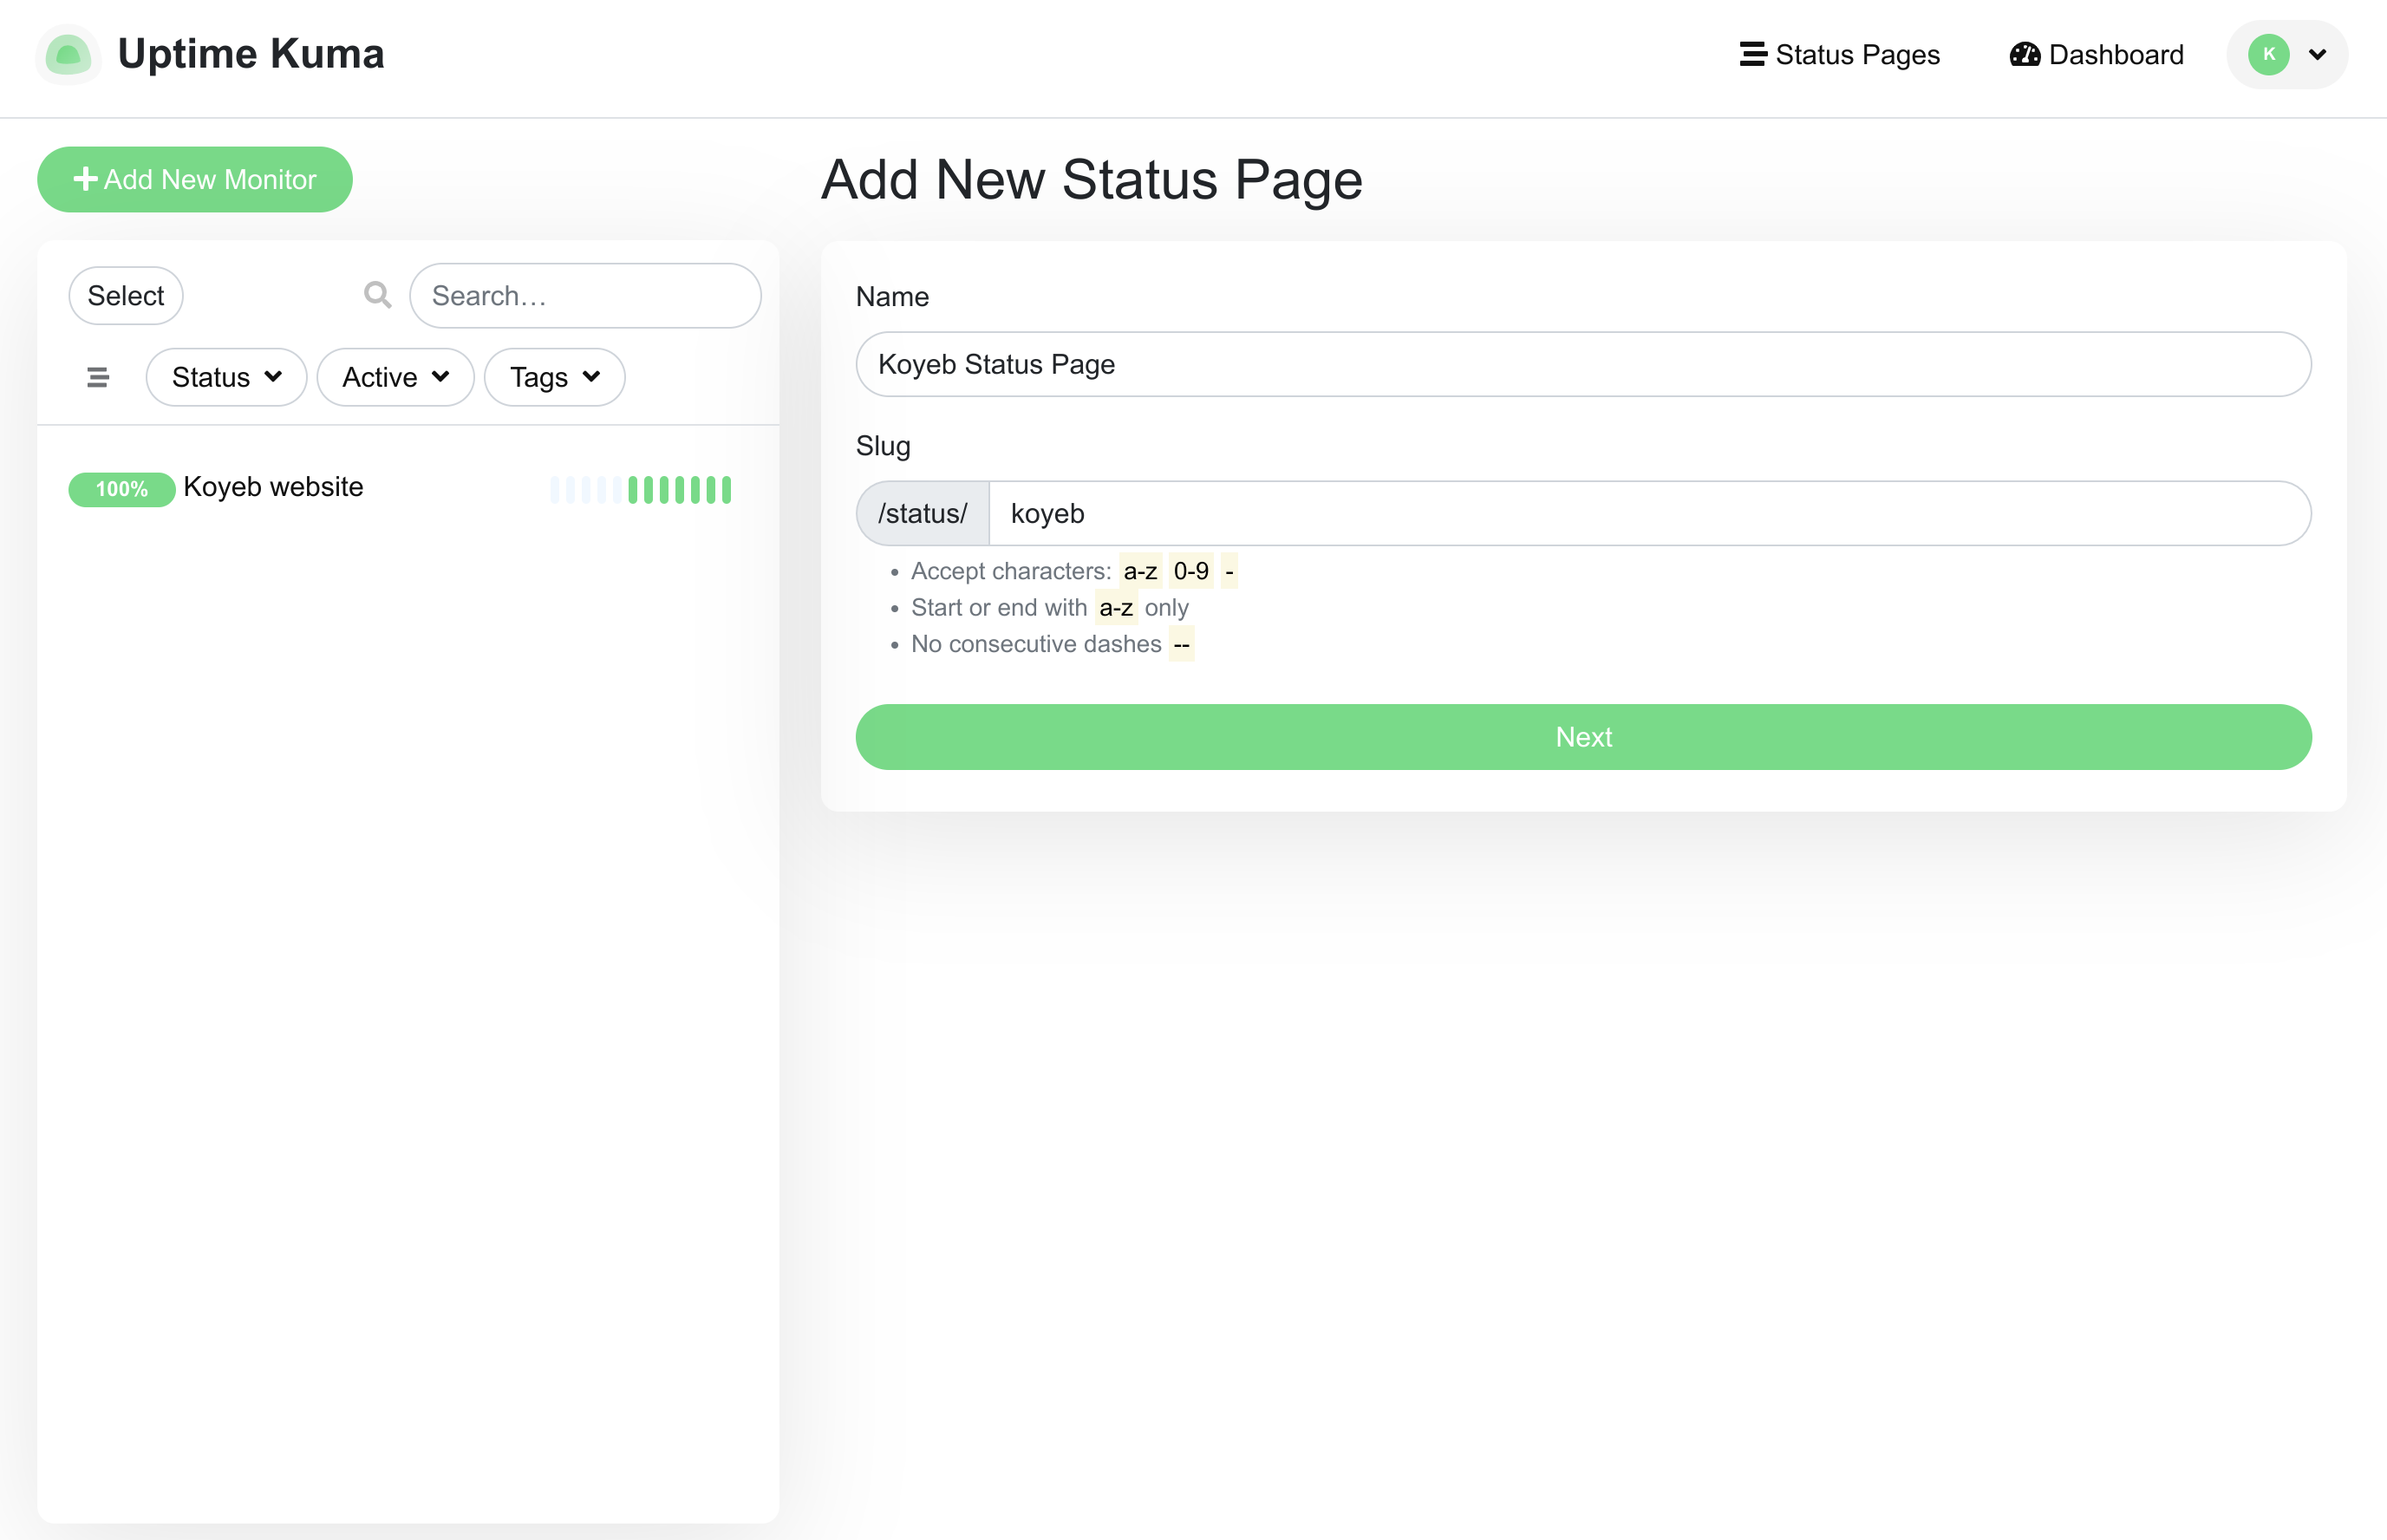
Click Next to continue.
On the next page, add a Description and a Custom Footer to tell users about the purpose of the page and provide additional details. You can use either the fields in the left sidebar or the fields in the main window.
Select the monitor you configured in the Add a monitor drop-down menu:
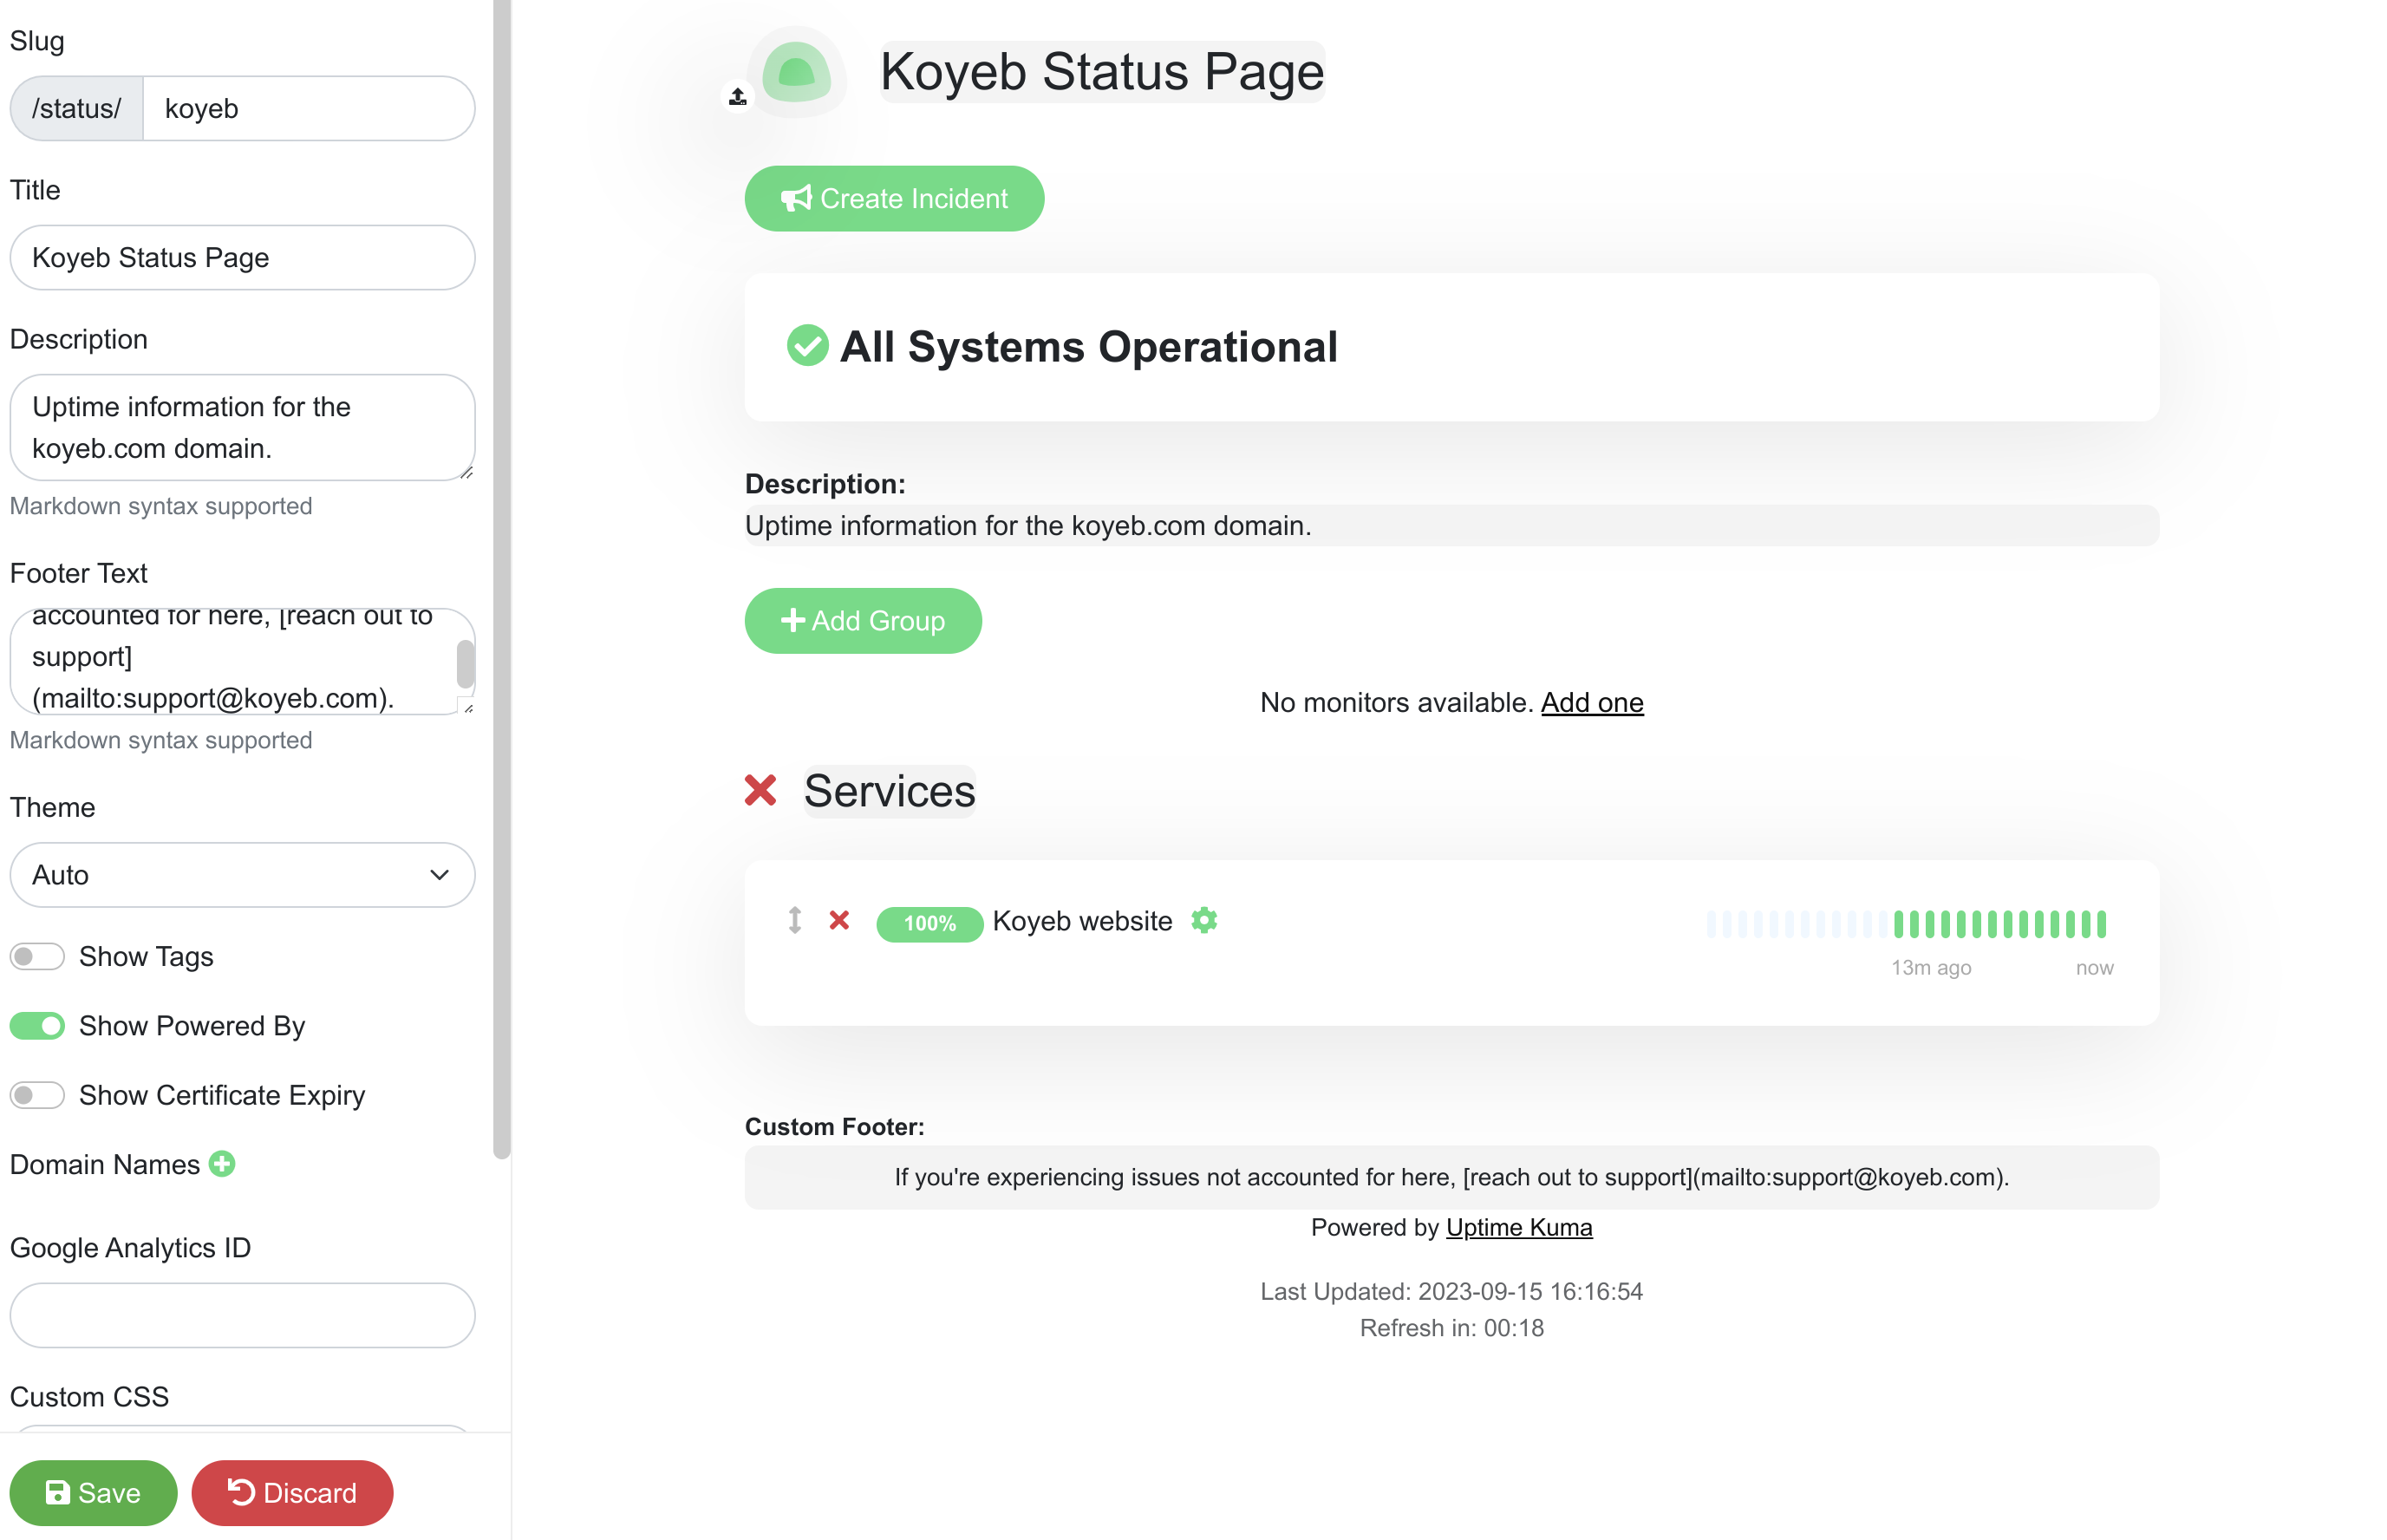
Click Save when you are finished.
You will be taken to the new status page with admin functionality enabled:
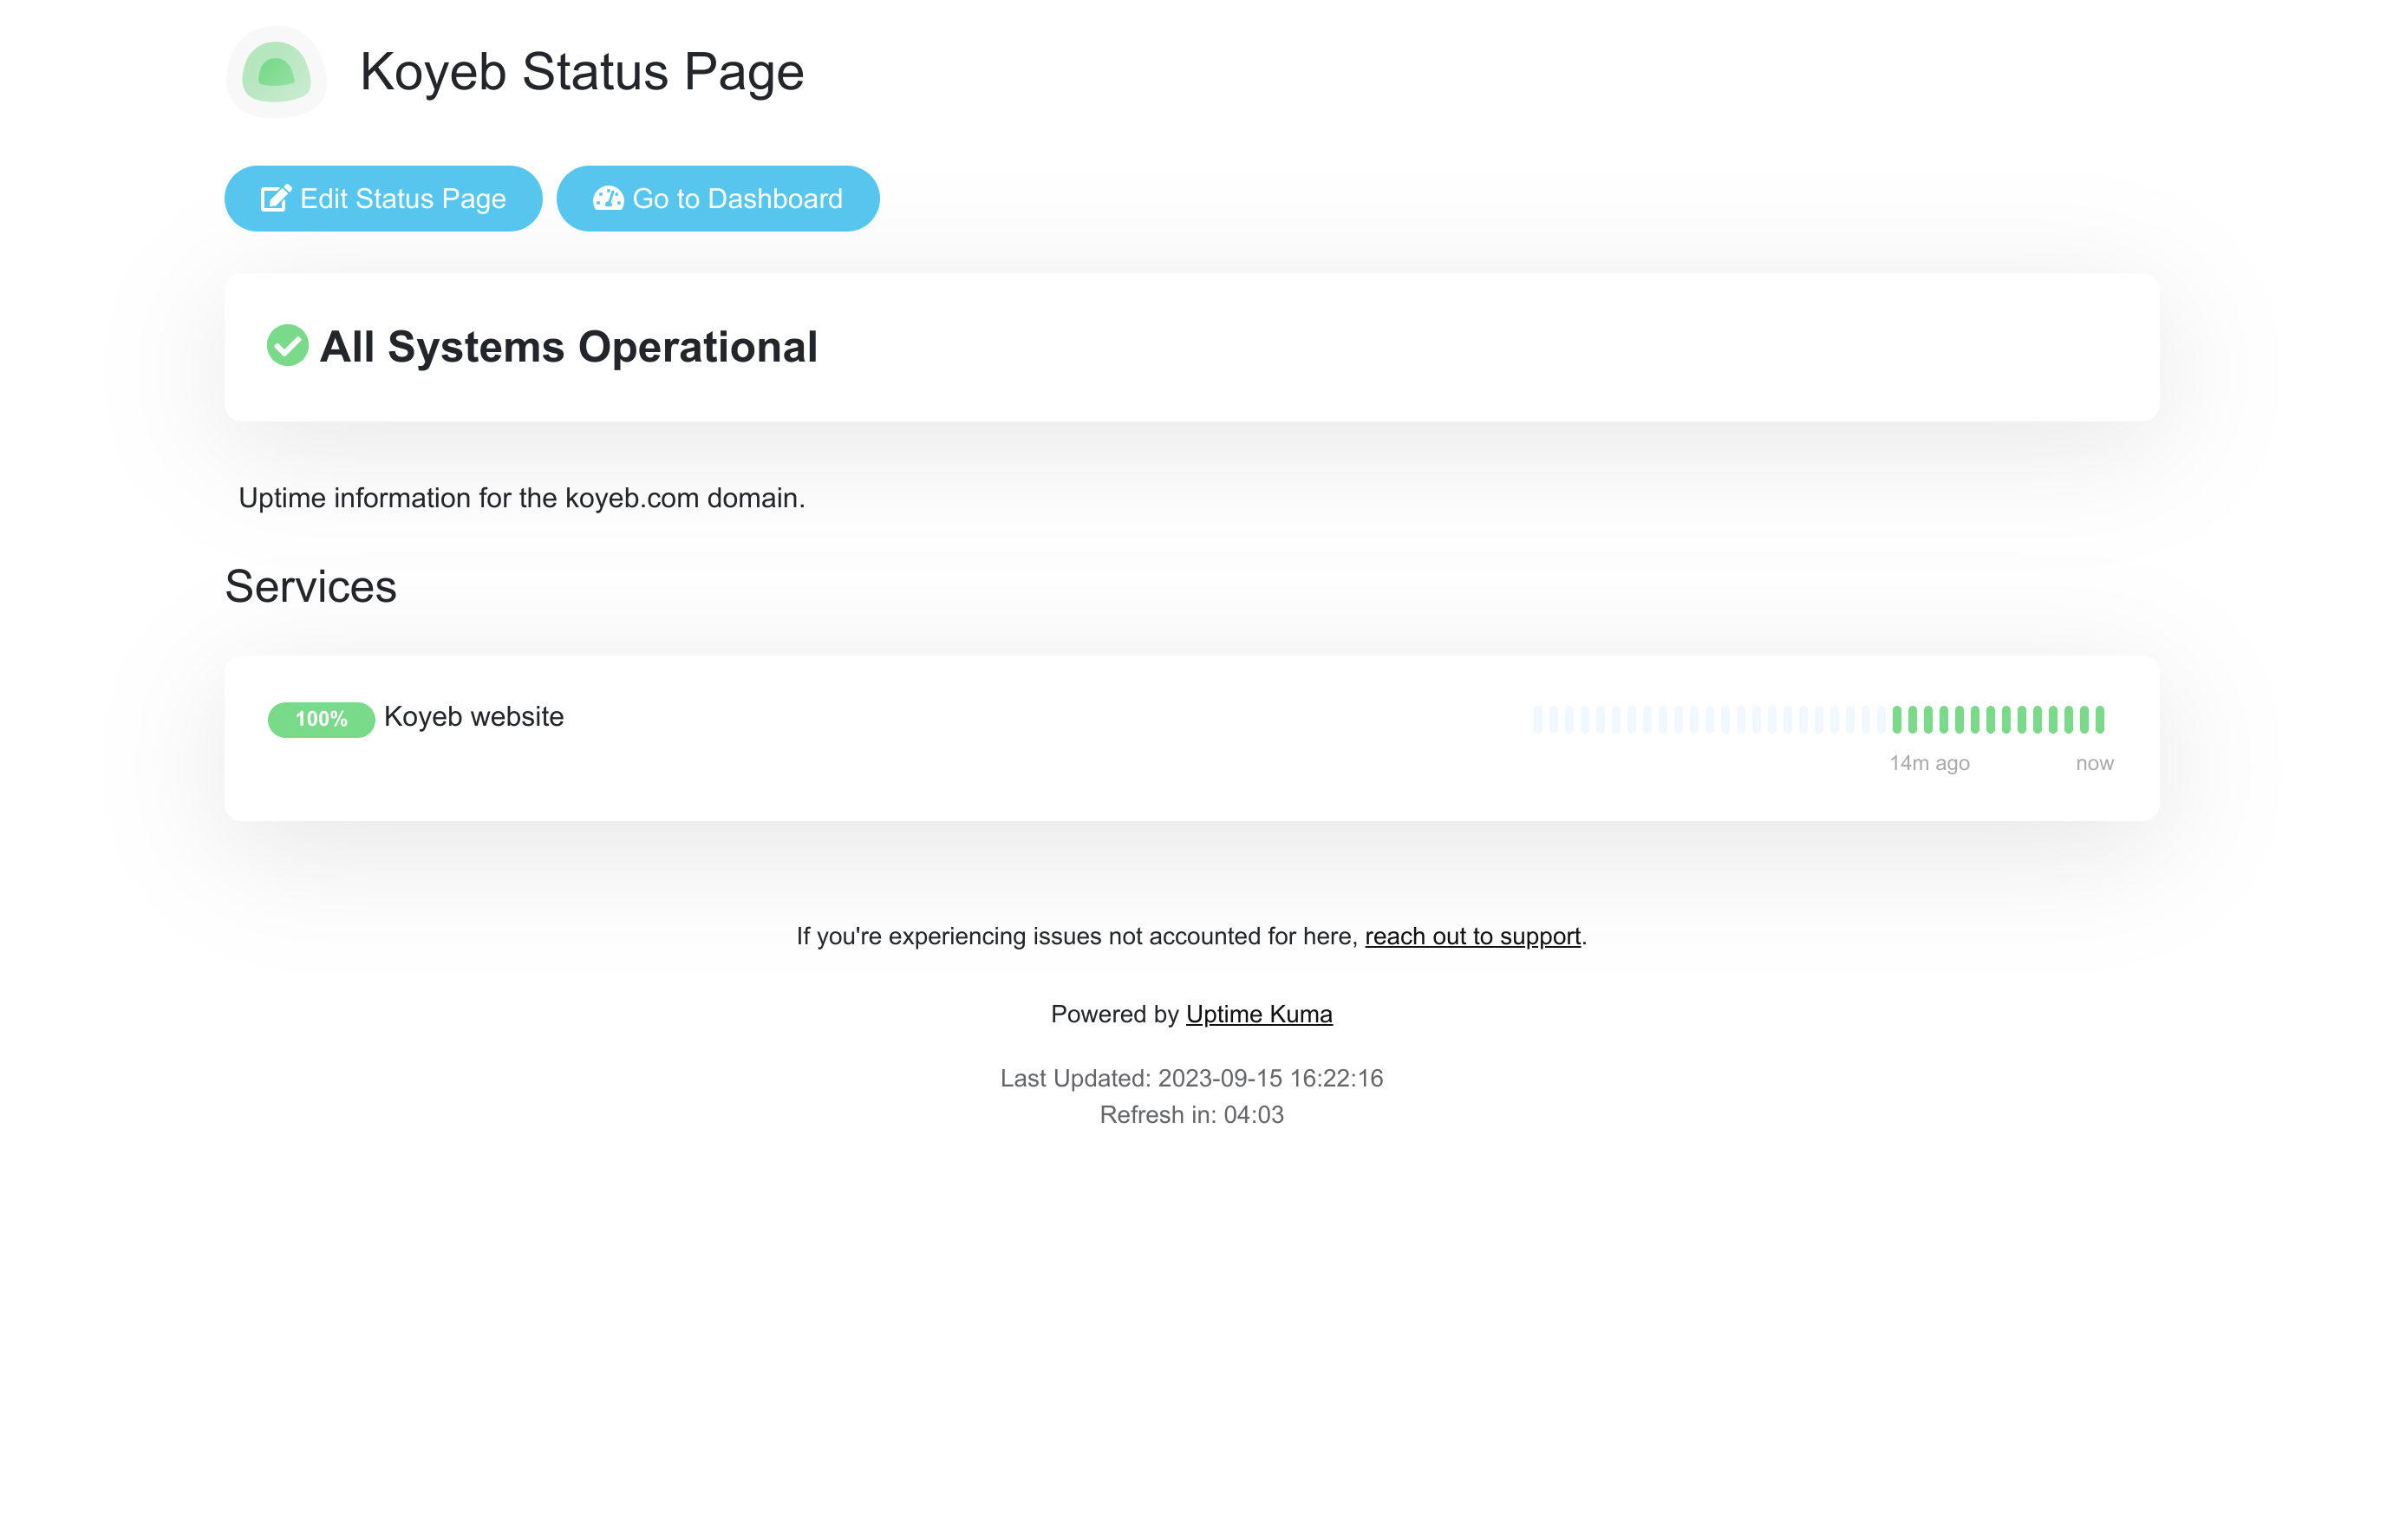
Click Edit Status Page to return to the page configuration.
Click Create Incident to test the incident management functionality. Fill out the form and choose a style to display your incident:
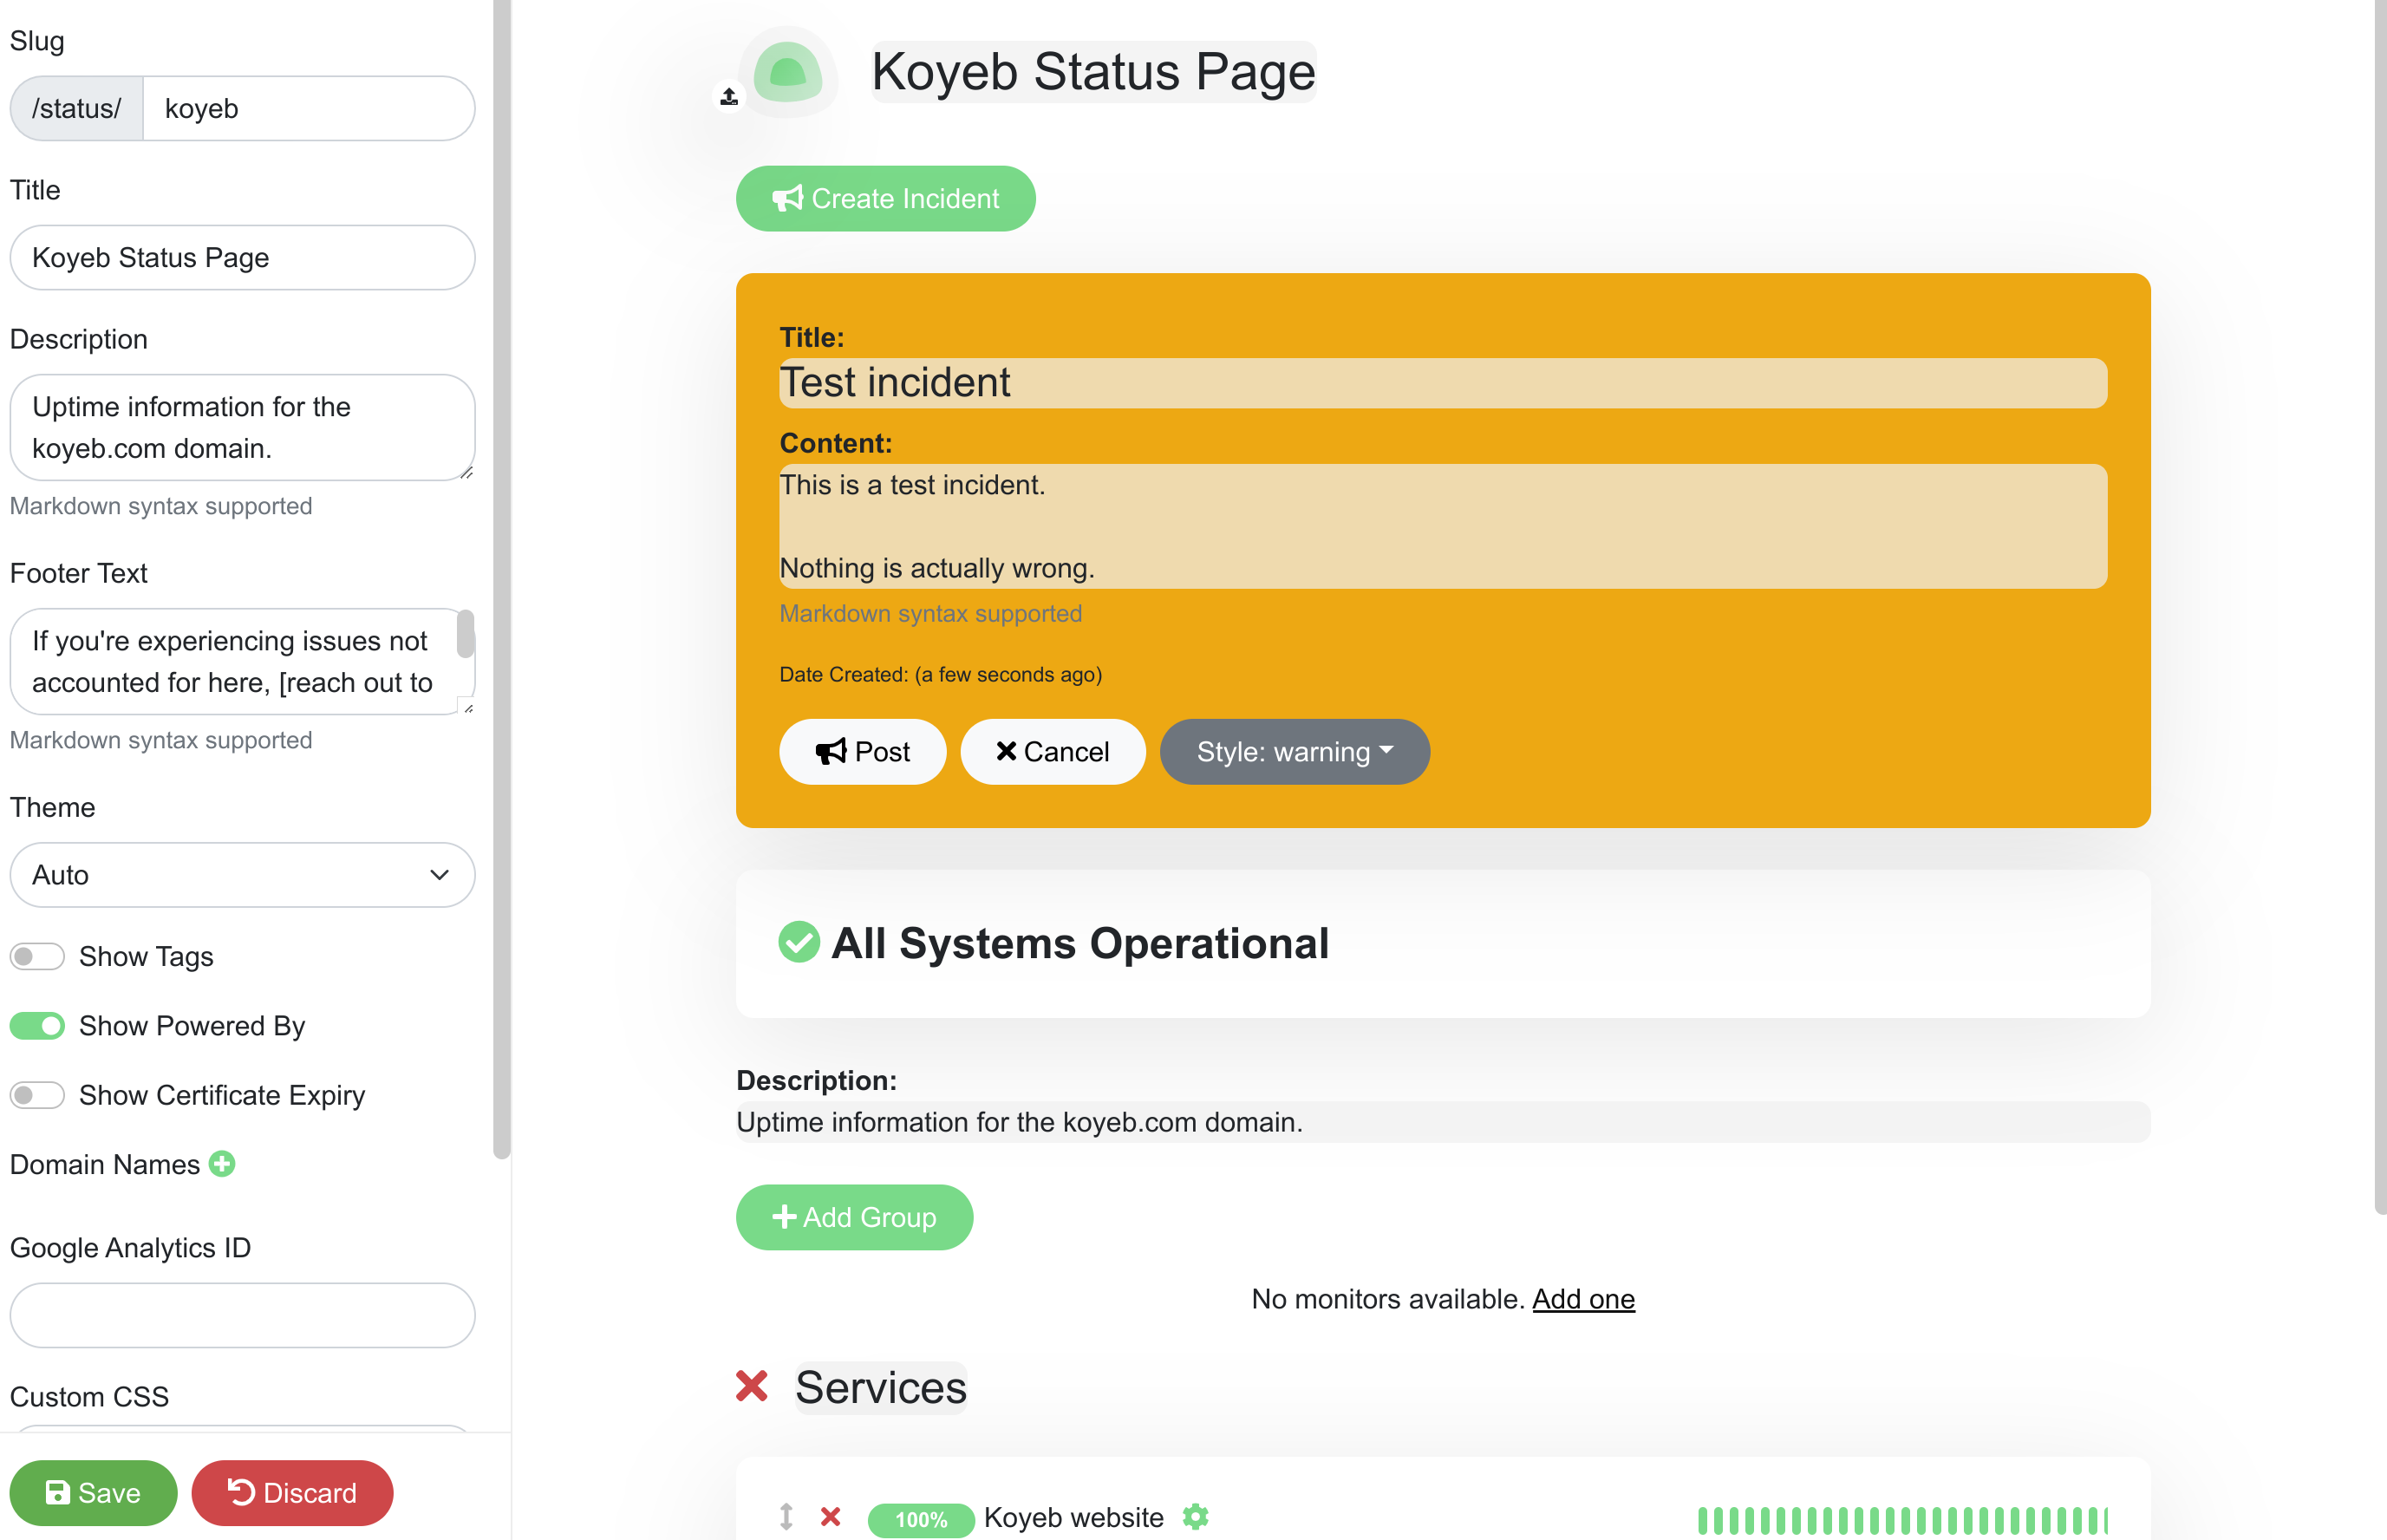
Click Post to add the new incident to the top of the page. Click Save in the bottom left corner to update the live status page:
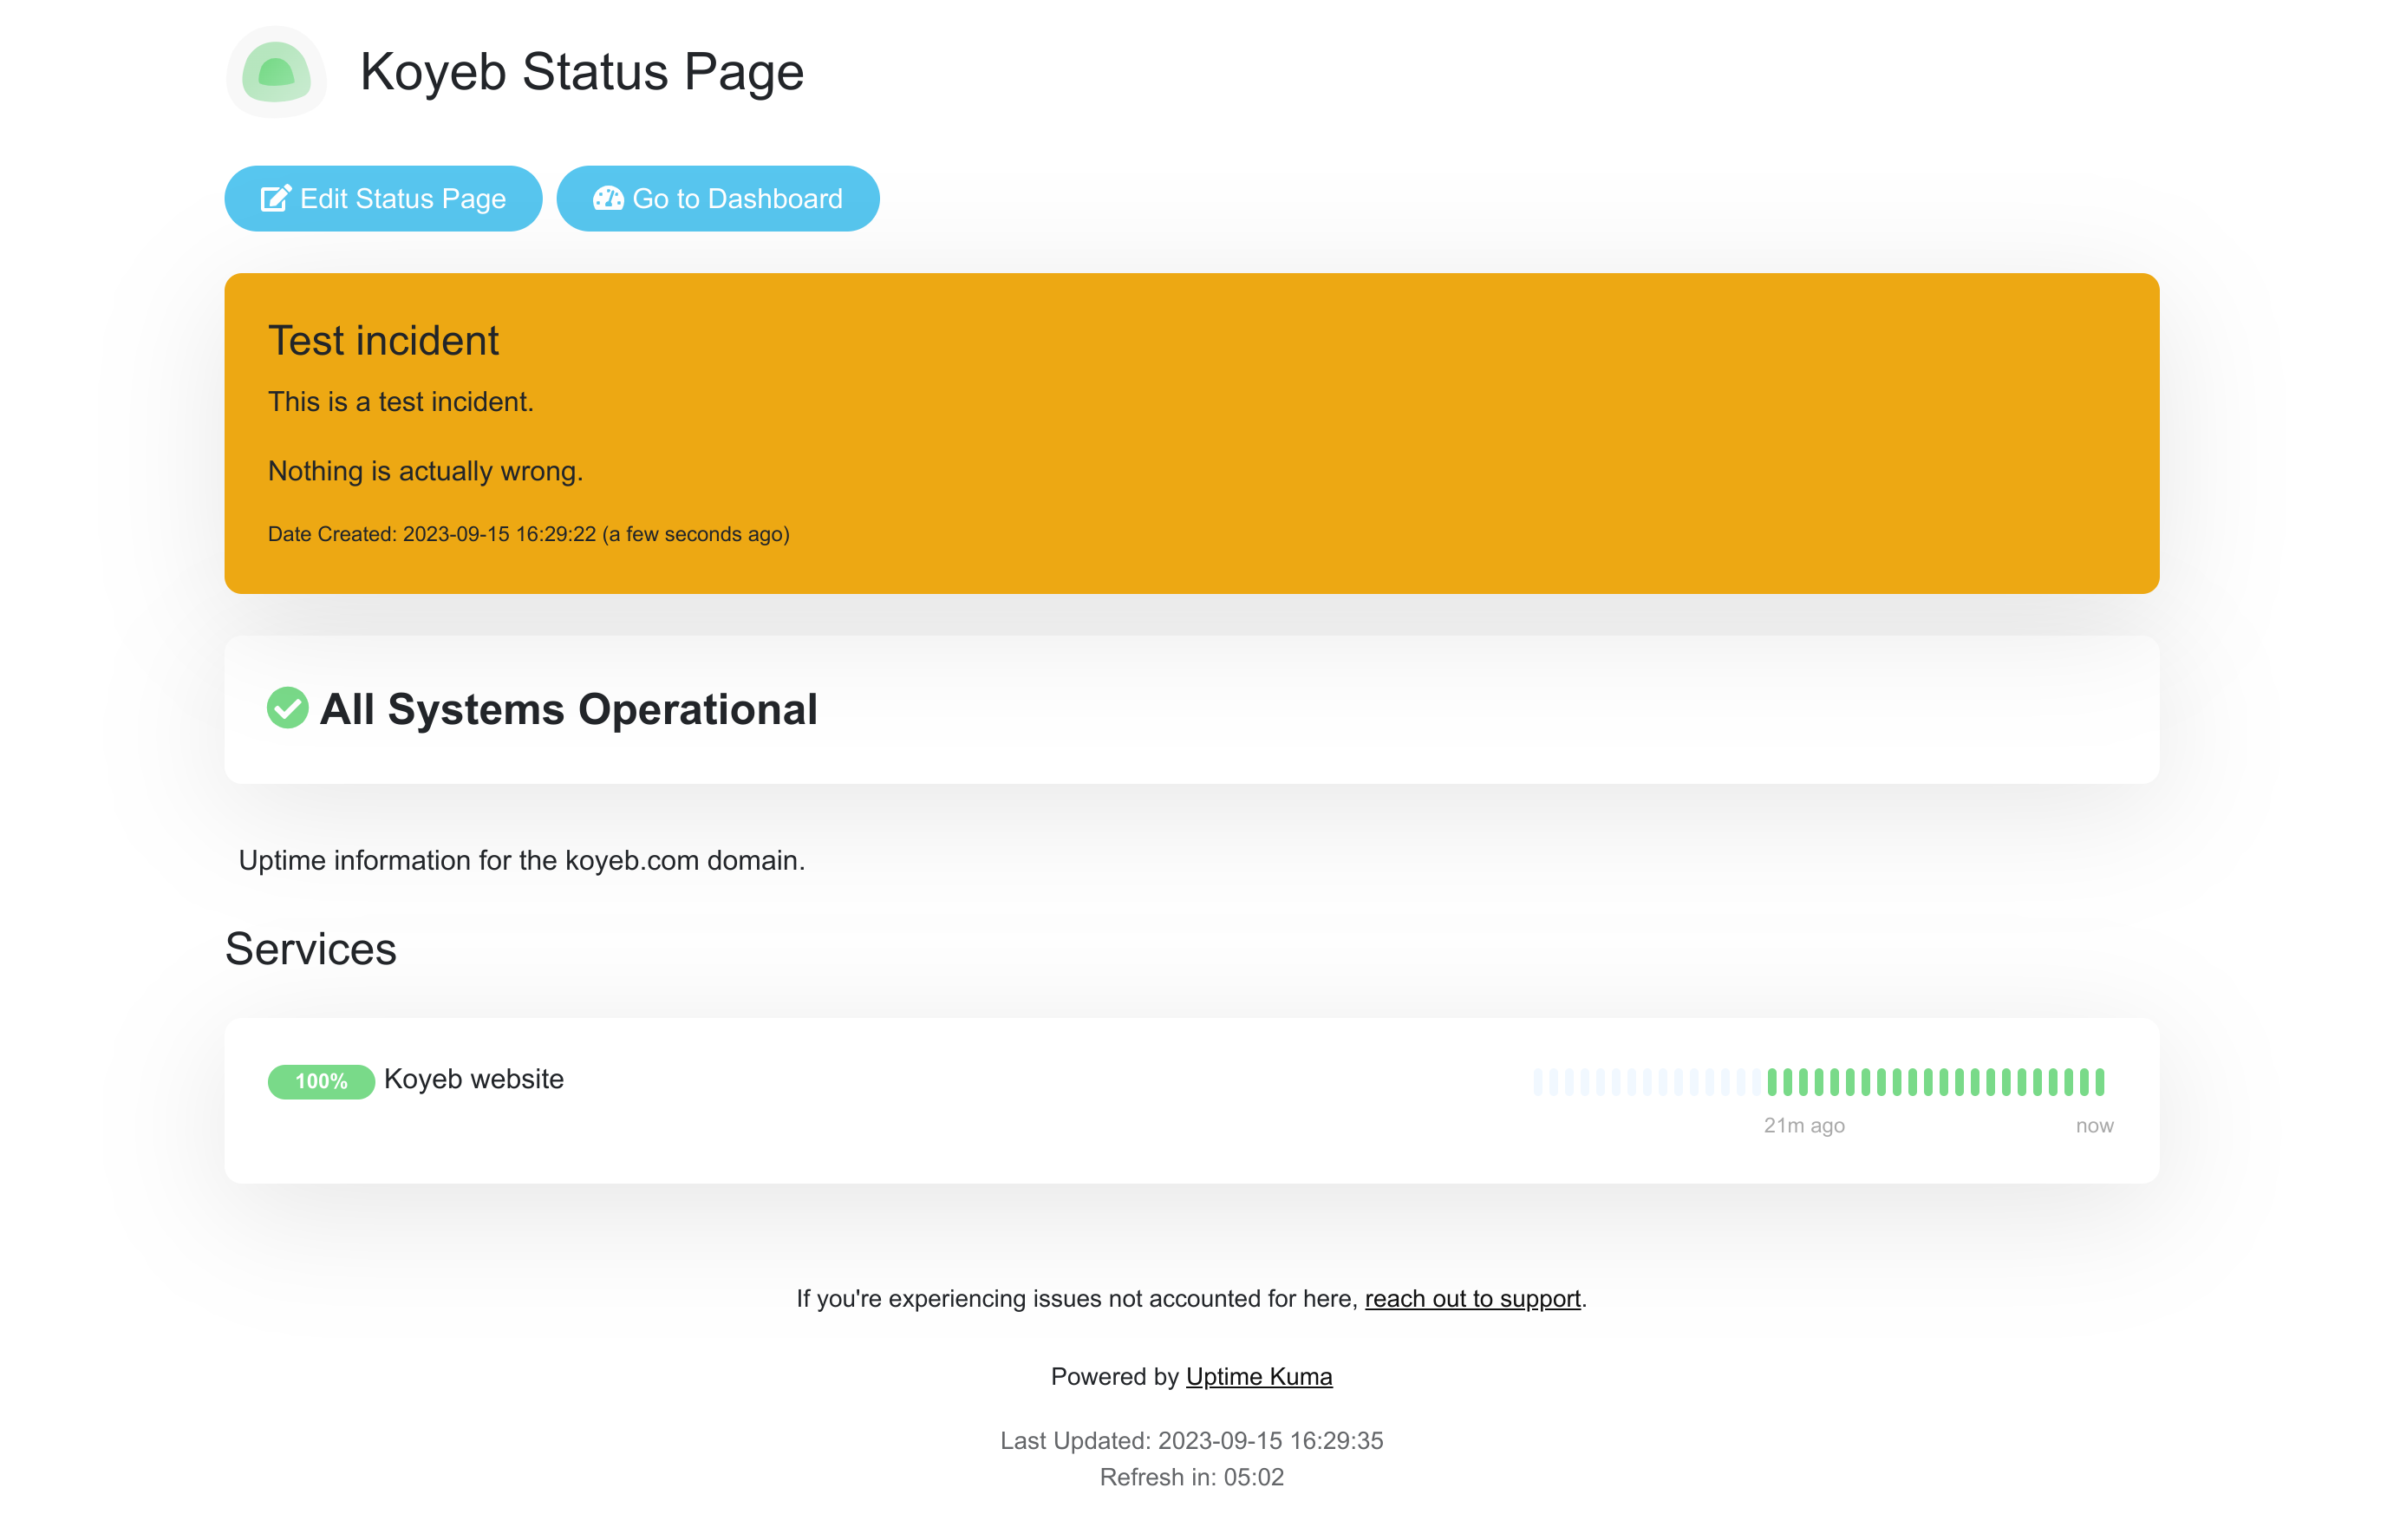
To delete the incident, click Edit Status Page again, click Unpin to remove the incident message, and then click Save again.
Conclusion
In this guide, we deployed Uptime Kuma to Koyeb to configure monitoring for sites and services. We created a custom Dockerfile that bundles Uptime Kuma with Litestream so that the local SQLite database will be streamed safely to an object storage bucket provided by Backblaze. After building and deploying the service, we configured it to send emails using a Mailgun account and demonstrated how to configure service monitoring. We created a public status page from our monitors that users can use to understand service availability.
Because the database is being replicated in real time to object storage, the service can be redeployed freely without losing data. The database snapshot and all subsequent replication logs will be downloaded and applied by the new service instance upon starting. This means we can keep our status page infrastructure lightweight while ensuring recovery is a painless experience.


